› Members Forum › RTR Conversions › Rollling Stock › Bachmann Auto Trailer
- This topic has 12 replies, 3 voices, and was last updated 2 weeks, 6 days ago by
asjharris.
-
AuthorPosts
-
-
February 23, 2023 at 6:05 pm #244037
 John CutlerParticipant
Has anyone converted one of these?
I have fitted EMGS wheels (live to one wheel and probably KM-manufactured) but the flanges seem to foul the copper plates fitted for current collection (for lighting I assume). At first I thought the brakes were responsible for the awful drag but I can hear faint metallic scraping. I guess I could remove the pick-up plates from the bogies but I was hoping to use them to augment the unreliable pick-ups from its unsprung partner 64XX. I suppose removing them would enable me to fill the horrible holes in the floor!
Has anyone used Alan Gibson wheels (rather than KM) successfully?
Any thoughts are welcome.
-
March 2, 2023 at 5:48 pm #244060John CutlerParticipant
Ho hum, it seems the EMGS lacks the usual GWR fans so no responses to my plea! Anyway, here is a précis of my experiences.
If, unlike me, you have no plans to: use the current collection facility; fill in the horrible floor holes; paint over the bright floor; populate the interior; then the bogies can simply be demounted by unscrewing the central screws. I recommend this anyway as working with the entire chassis I managed to knock off one of the delicate end steps; minimise handling if you can!
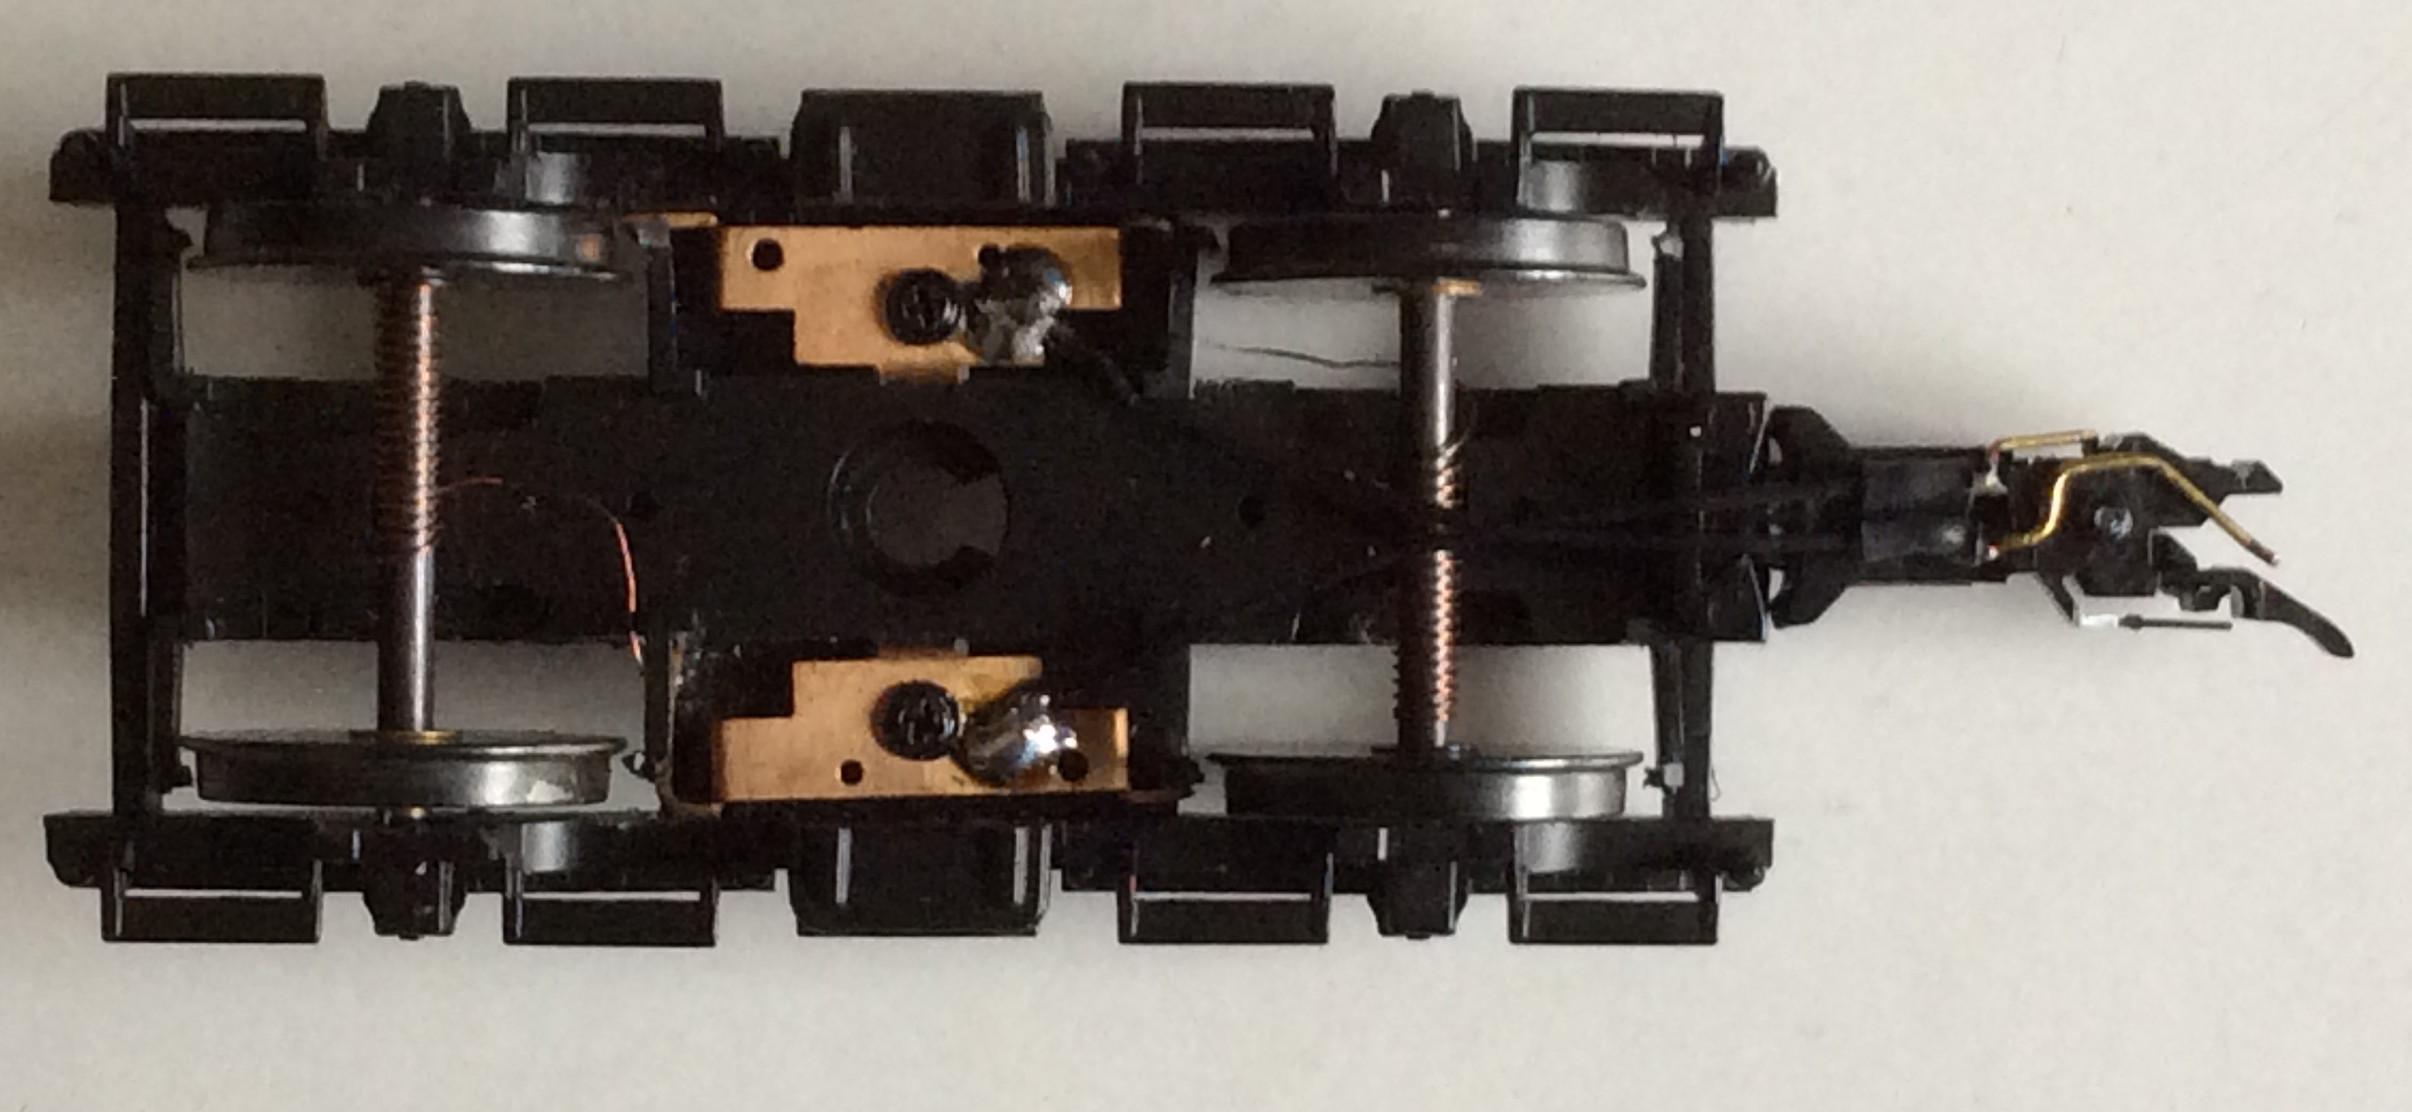
The Bachmann axles are quite a bit shorter than standard so as to fit between their copper (supposedly bronze but looks like copper to me) pinpoint pick-ups. To fit standard EM pinpoint axles these copper pick-up extensions must be bent back or removed. I failed to do this adequately and discovered some wheel flanges were scraped by the copper remnants. The brakes annoyingly line up with the EM wheel flanges. After numerous frustrating attempts at reshaping the brakes (the linkages are horribly springy), the only way I could obtain reasonable running was to cut off the brake shoes totally. This is not especially noticeable because the shoes are mostly hidden by the bogie frame. At some time in the future I may add some cosmetics if the absence of shoes annoys me. I thought that opening up the axle-boxes slightly with a bearing reamer might yield better running. However the one axle subjected to this now runs less freely; maybe I overdid it. The proper engineering solution would be to drill out the axle boxes and insert brass pinpoint bearings. I reckon I would make a mess of that so this will only be performed as a last resort; new i.e. alternative bogies might be preferable.
There is a trick to getting the EM axles into (and out of) these bogies. Trying to insert the axle first time in one go is nigh impossible. Instead, insert one of the axle pinpoints into the gap below the axle-box, not into the axle-box, then insert the opposite pinpoint into its axle-box; the remaining pinpoint can then be pushed up into its axle-box. Be careful you do not squeeze the wheels together strongly or you will reduce the back-to-back.
As you can see, I added DCC Concepts pick-up springs to the axles and soldered the ends to the existing copper plates. Initially these naturally bunched against one wheel but I realised this creates drag so have tried to centre them on the axles. These springs do produce some friction but hopefully less than conventional pick-ups. Alternatively, there is space above the bogies for conventional wire or strip backscratcher (or even wheel-tread) pick-ups to be fitted simply to the copper uprights; this would have the advantage of current collection from all 4 bogie wheels instead of 2.
The electric coupling is by Viessmann; product code 5048, expensive at €18.50 but well-made. It has a very clever locking pin which can be lifted from underneath to uncouple. Its mate is fitted to a Bachmann 64xx which suffers from lousy power supply.
Attachments:
-
March 2, 2023 at 5:50 pm #244062John CutlerParticipant
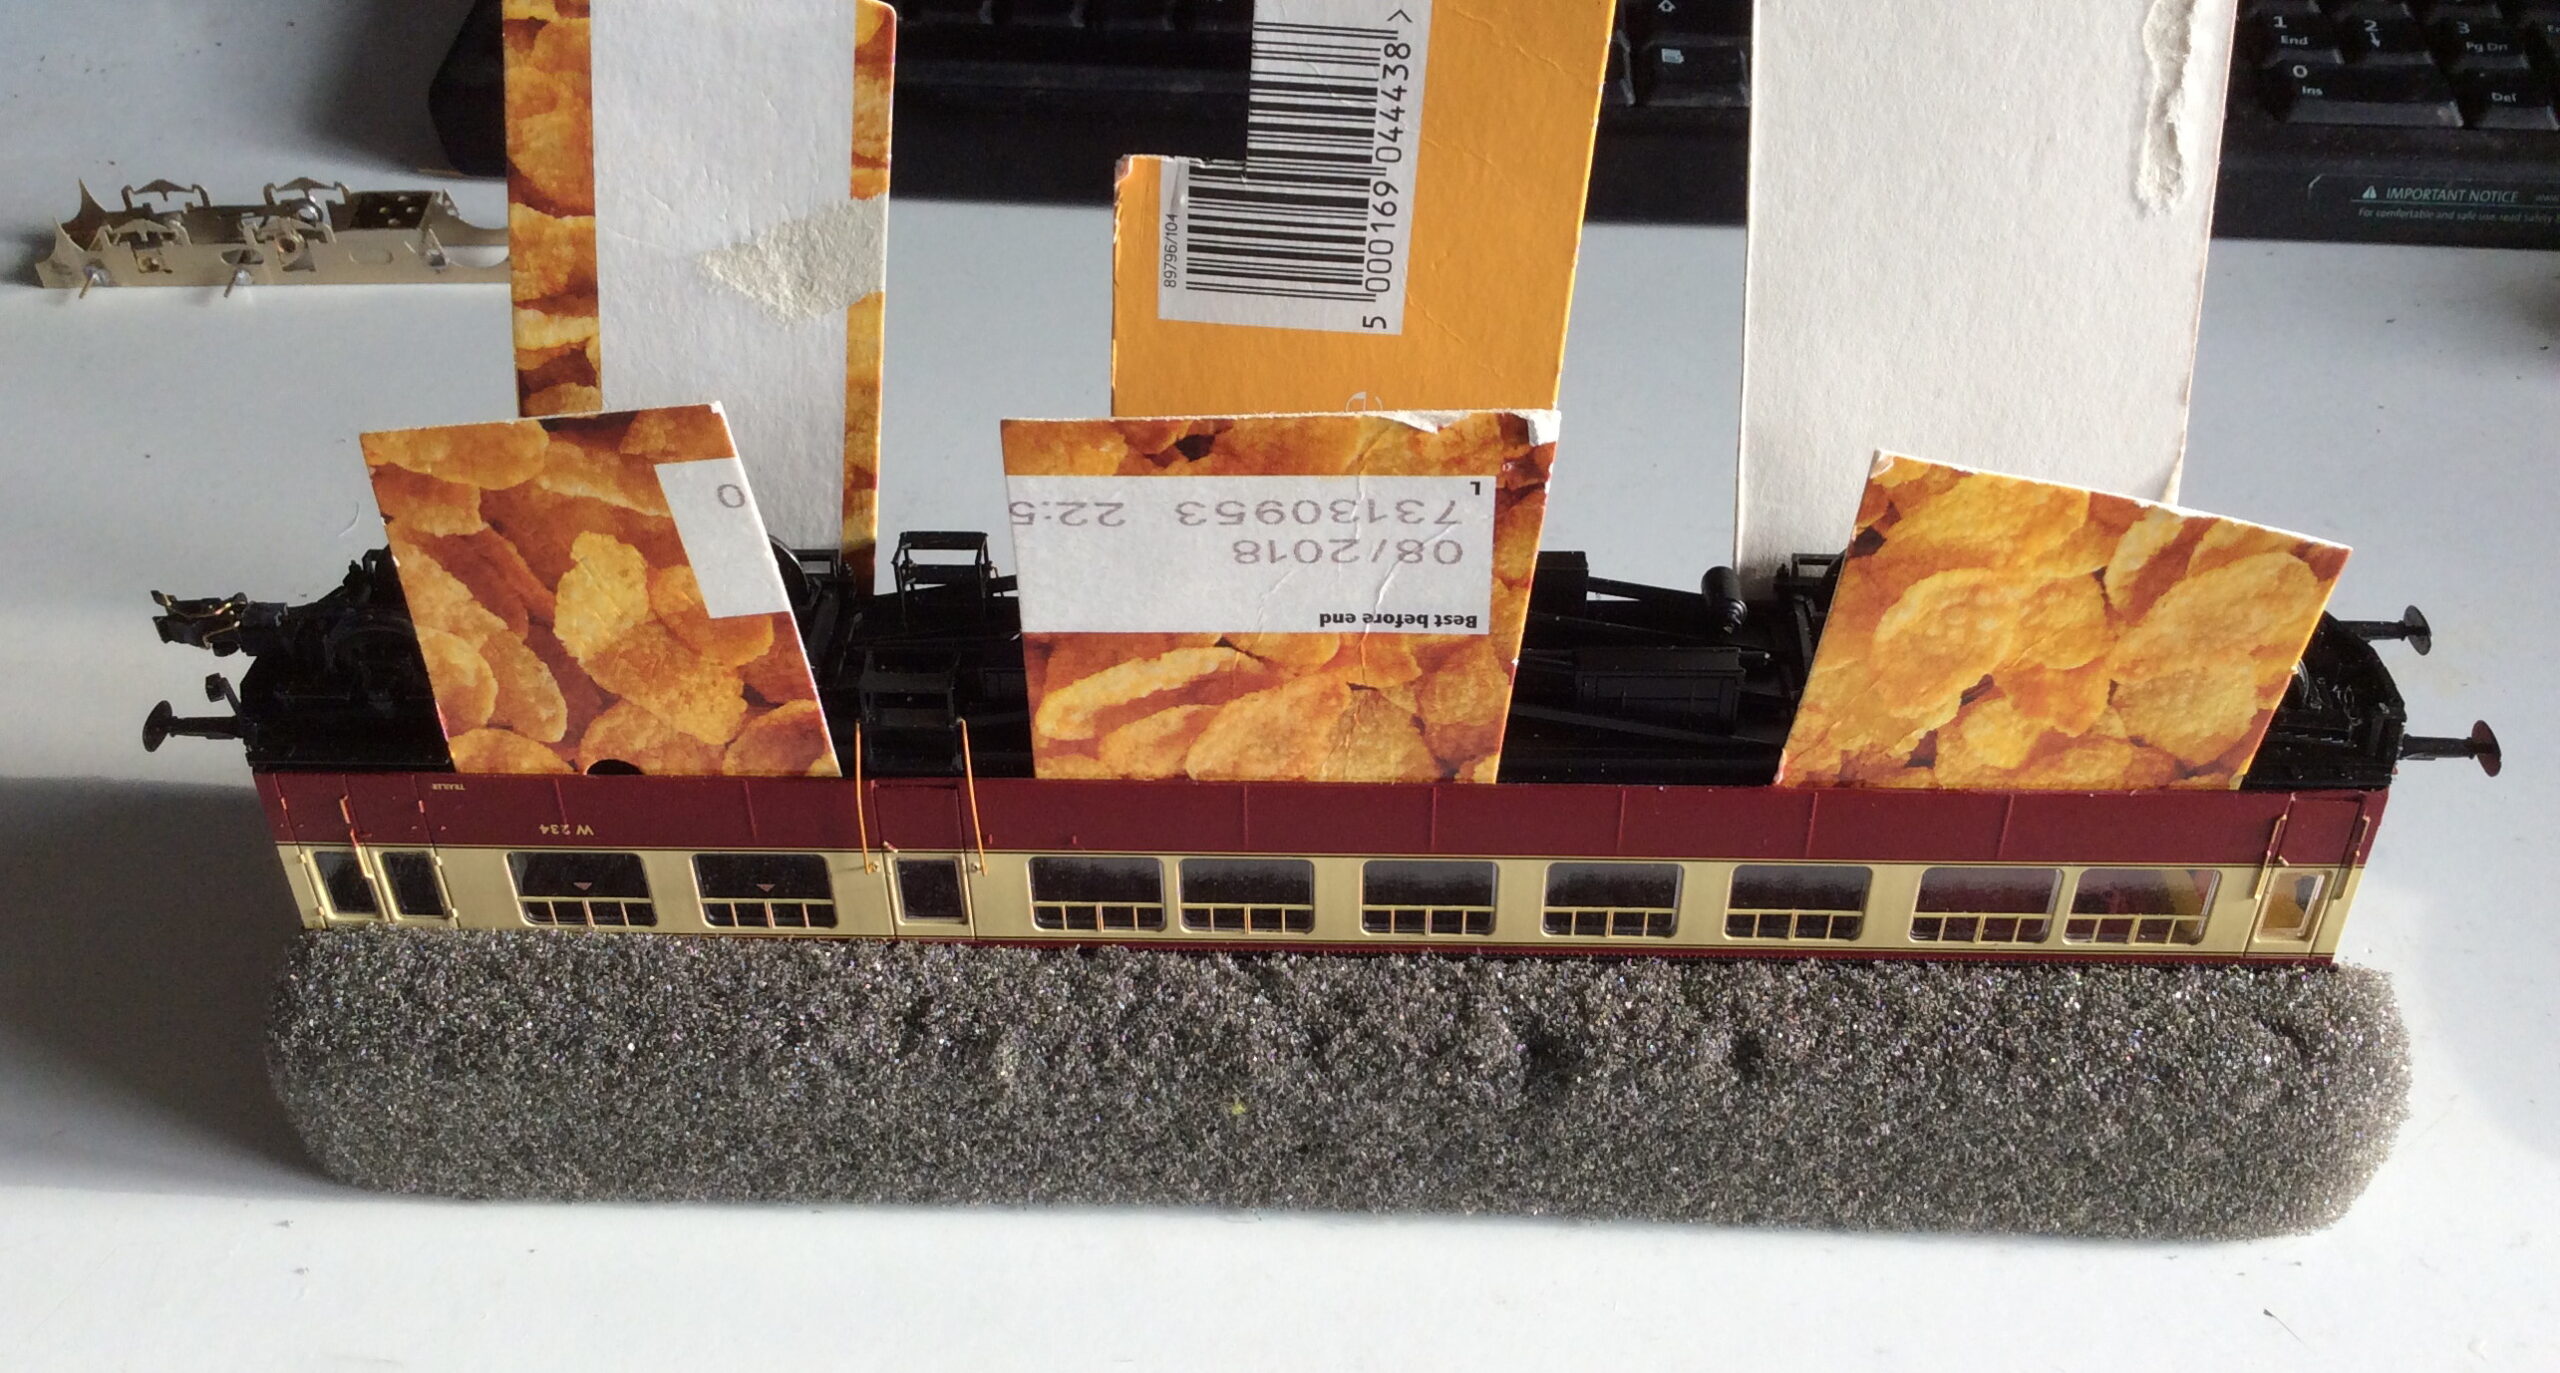
Bachmann include an instruction as to how to remove the body from the chassis. You need to disengage the step handrails first. I found it easier to undo the handrails from the body rather than the chassis; others prefer to undo the chassis fixing. Re-assembly of the handrail to the body was easy for me; once located into its hole, it tended to spring back in. I used 6 pieces of cereal packet card slid between the body sides and chassis to undo the 8 body clips. Ensure 4 of these wedges are fairly close to the corners. With all 6 cards inserted and the body upended, I found the chassis just lifted away easily from the body.
Attachments:
-
March 2, 2023 at 5:51 pm #244064John CutlerParticipant
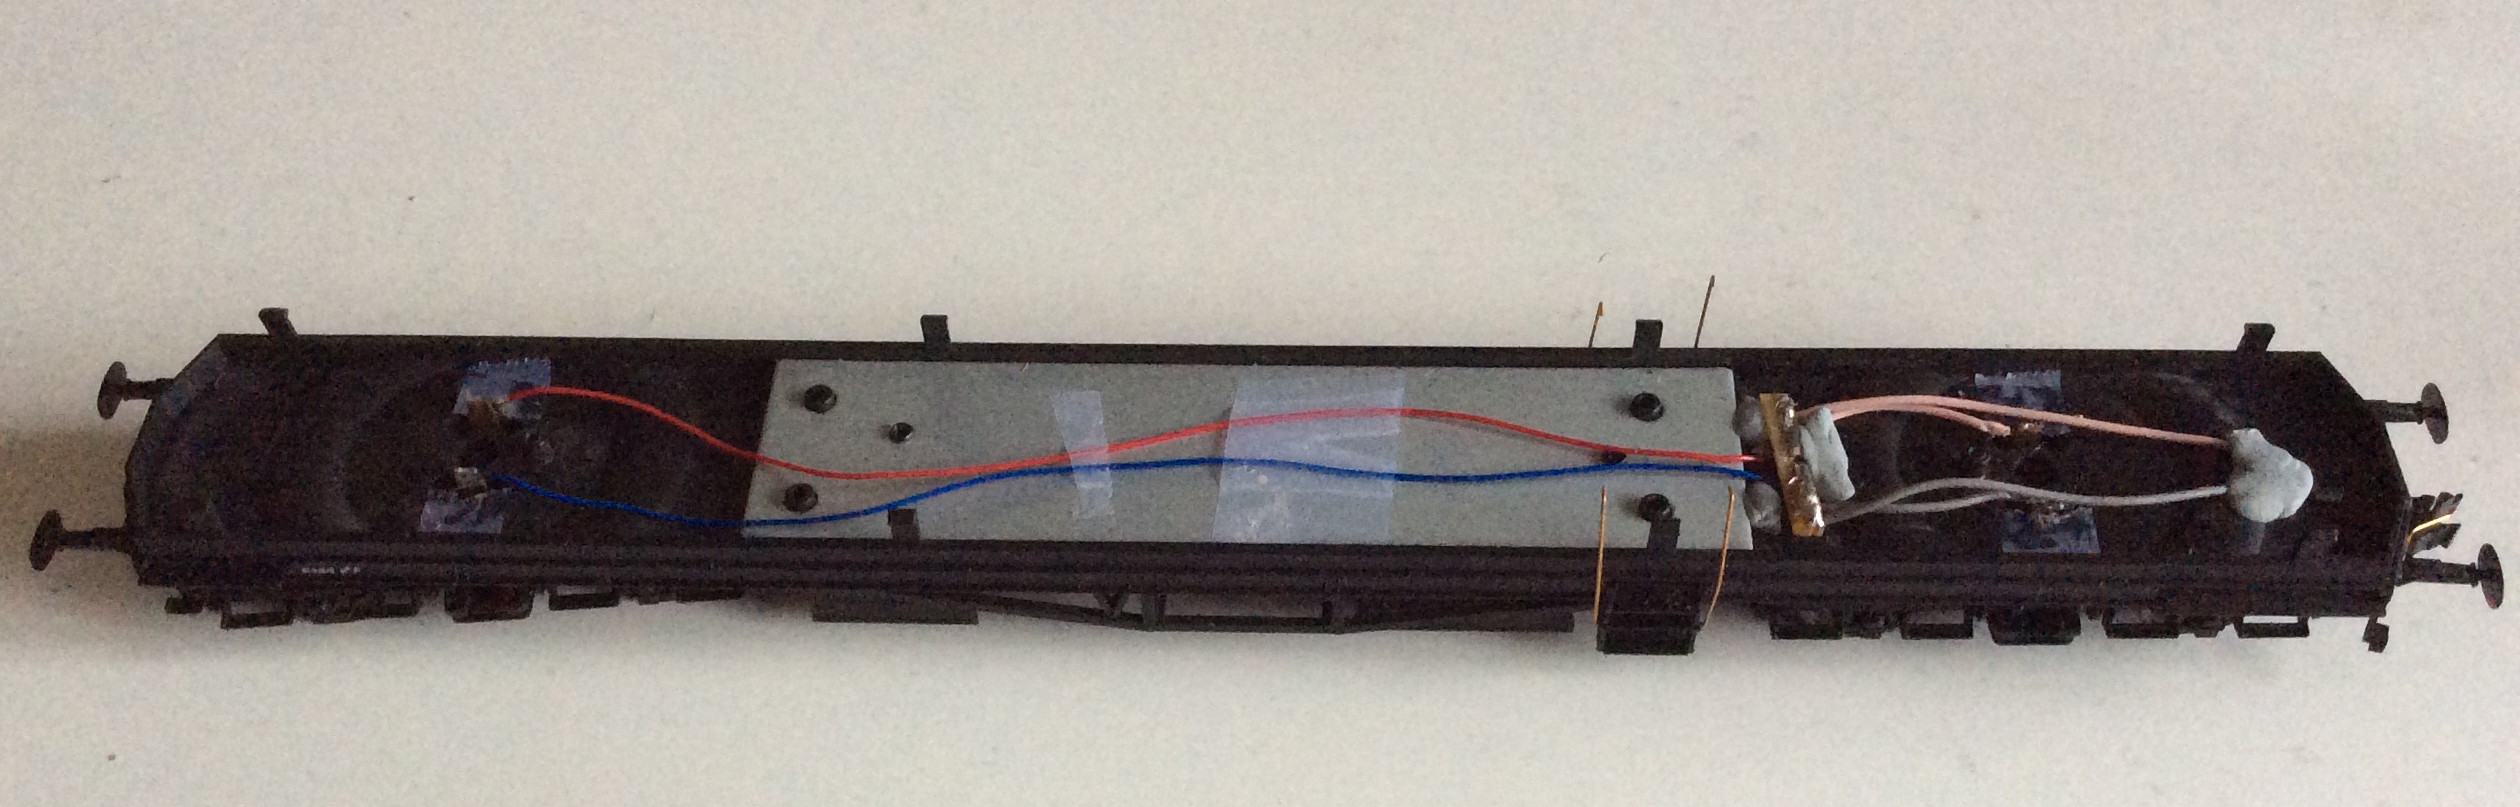
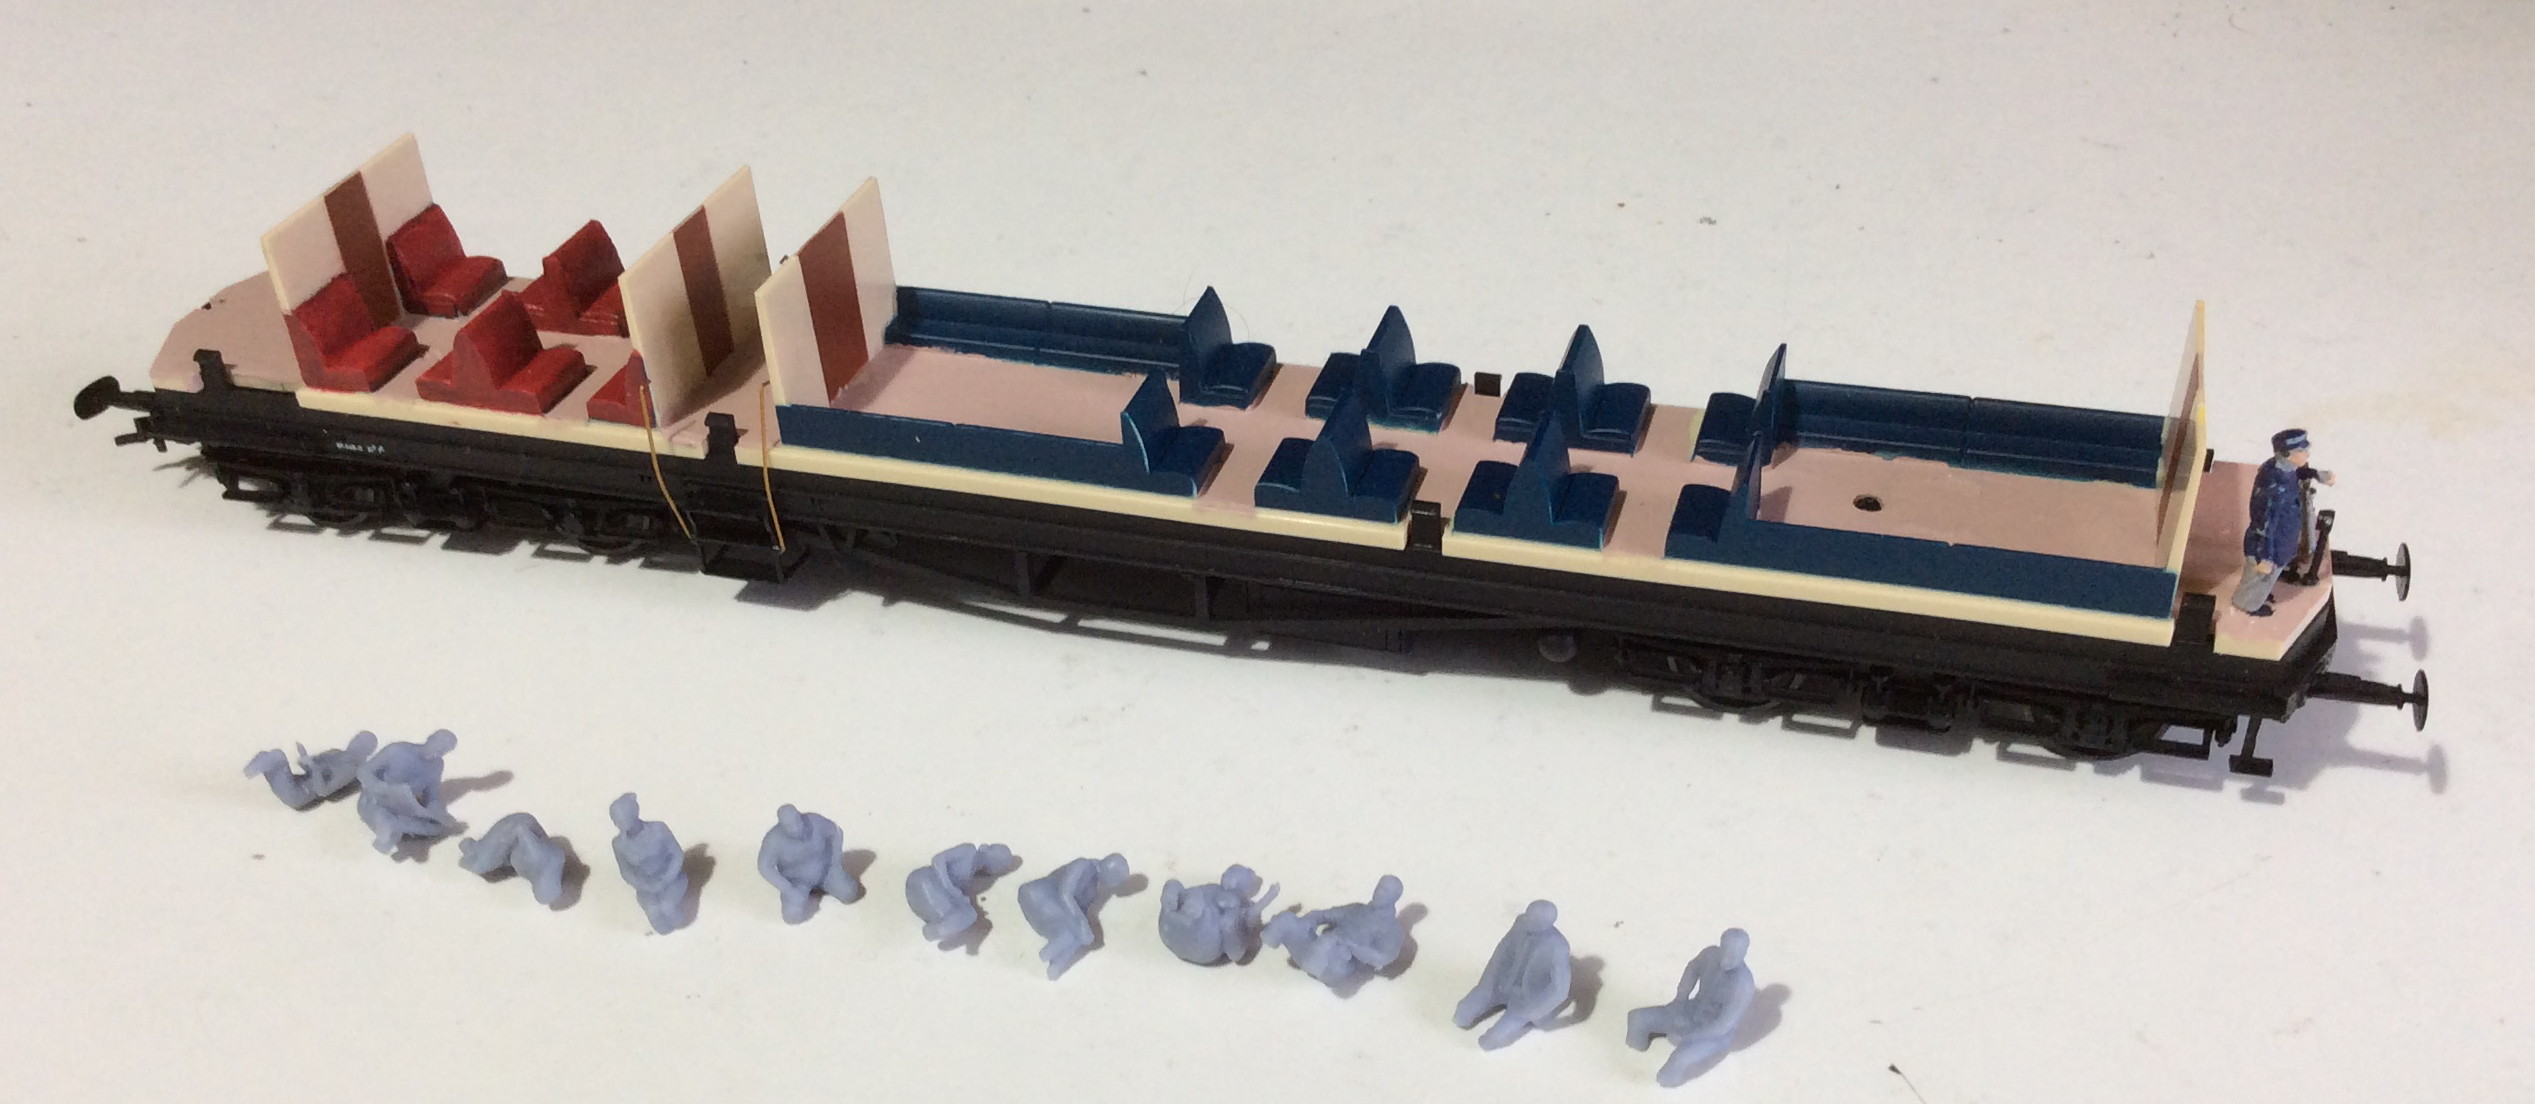
Here is the converted chassis with wires running under the flooring. The tops of the copper uprights have been trimmed off so they no longer protrude above the floor. The small squares of magic tape next to the uprights are to help prevent the soldering iron from melting the plastic. The spare connector (held down by Blutak) was used to test some supercapacitors for stay-alive placed in the guard’s compartment (disguised as parcels covered in tarpaulin); unsuccessfully. I guess it could be used to power led lights but that is a project for the (distant) future.
Attachments:
-
March 2, 2023 at 5:52 pm #244066John CutlerParticipant
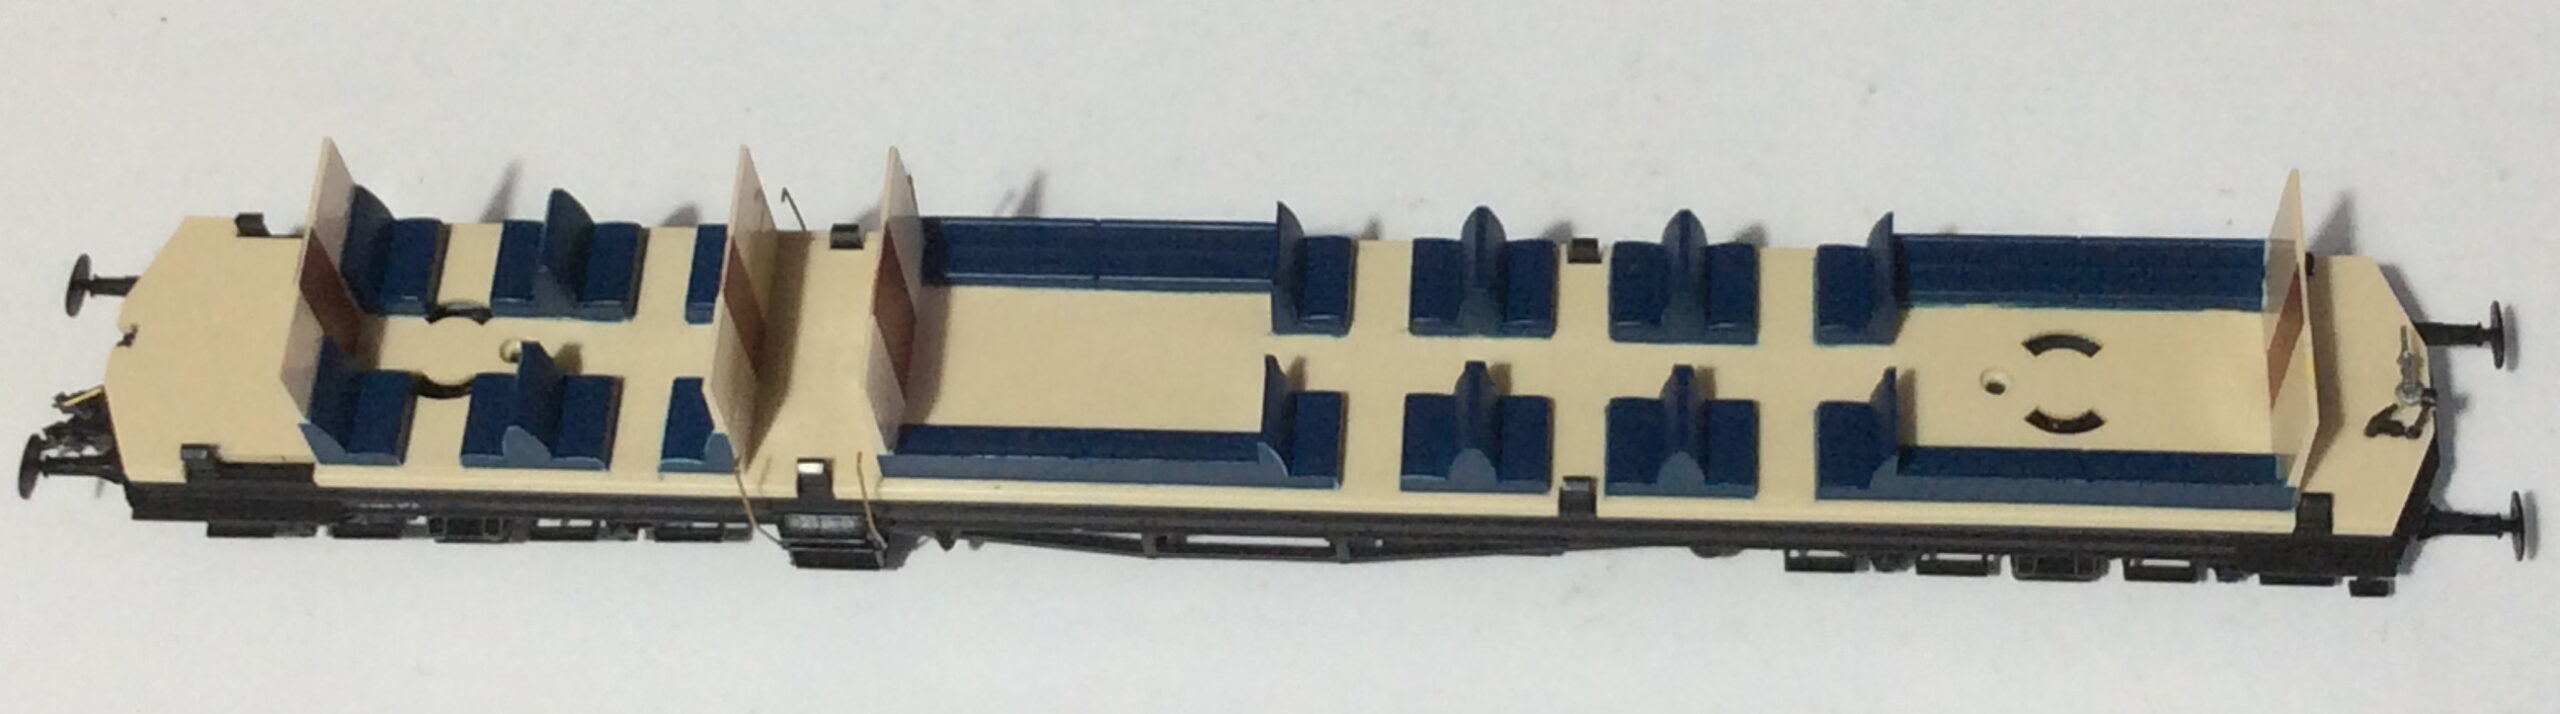
Here is the floor interior, as supplied by Bachmann, sitting on the chassis. Look how thick and how bright the floor is. Those prominent holes for lighting will be filled. It seems the seats in the Non-Smoking saloon were a patterned dark red and white (so a darkish pink or light maroon for me). The floor should apparently be red oxide which would have rapidly faded and/or muddied; presumably to a brownish light pink. Or am I wrong?
The original plan was to populate the coach with the expensive but excellent set of dedicated figures sold by ModelU. I thought the openness of the auto trailer merited good quality model people. These were duly acquired and a happy couple of days were spent painting them to a reasonable standard. Now I discover that the thick floor requires their feet to be cut off! I am not happy to do that considering the outlay of resources. So some less detailed figures will be used, their feet will be amputated and then represented with paint on the floor. The exceptions will be the poor (to be footless) driver who will be very visible in the cab and the fireman destined for the 64xx. The rest of the ModelU passengers are destined for the open saloon in the Maunsell pull-push set; hopefully they will keep their feet!
Attachments:
-
March 2, 2023 at 6:32 pm #244068
Charlie Bloomfield
ParticipantJohn,
I’m not sure that it is just the lack of GW fans, I don’t have the Bmann model, I only have an old Airfix autocoach that I am going to convert along with the Dart detailing kit; but I do not find it exactly easy to follow what the latest messages are on this forum, hence why I normally the EMGS facebook page. I only came on here to look for details of the EXPO Bracknell exhibition and there is still nothing about it?
Regards
Charlie
-
March 2, 2023 at 7:33 pm #244069
Dai Davies
ParticipantYes, the old Airfix kit is easier to convert than is the Bachmann version. Re the latter, I discarded the copper lighting fixtures on the bogies, and rewheeled with iirc Alan Gibson wheels. Re the Airfix, I reamed out the bogie axle holes and rewheeled with AG wheels.
-
March 2, 2023 at 9:43 pm #244071Participant
The only thing with the Airfix model would be the glazing, the Bmann model is far better. The only other thing I heard of was the Bmann coach being permanently coupled to the loco (a 14xx), and coach current collectors being hardwired back to the loco?
-
March 2, 2023 at 10:31 pm #244072Participant
Hello Charles, Shawglaze do laser windows for the Airfix model which look excellent when fitted, very flush,etc. they are positioned and then glued in place with Klear/Pledge, and that’s a lot easier than it sounds asyou can just brush with Klear over the whole side: it then acts as non-gloss varnish for the side and a glue for the window. I hope that makese sense! There must be a youtube of the process somewhere. The glazing costs about £9. Other sets are for B-sets, diesel railcar: they all look good.
-
March 3, 2023 at 9:17 am #244073Participant
Dai, good call, I was thinking of using SEF flushglazing, I’ve never used Shawglaze but have seen its results which are far better. Using Klear sounds interesting.
-
March 4, 2023 at 9:29 pm #244083John CutlerParticipant
I decided upon acrylic paint for the floor and non-smoking saloon seats. The brush strokes tend to show up slightly. This helps to make the floor colour slightly uneven with only one coat. It tends to show an uneven surface on the red seats even after 2 coats and that helps create the illusion of fabric. Excess paint in the wrong place can be scraped off with a small blunt screwdriver. Mixed paint can be stored overnight by adding a drop or two of water and sealing under clingfilm. For the seats I used approximately 70% carmine red and 30% mixing white, The floor is roughly 80% pale umber, 15% raw sienna plus 5% vermillion (and probably would be better with a bit more raw sienna).
Overpainting the seats red seems to make them larger than their blue counterparts. It could be the extra layer of paint but I suspect it is an optical illusion. Eliminating the glossy white floor makes the interior a bit duller. To compensate for that I painted the interior roof white, which replicates the real thing; this should lift any gloom. I wonder if Bachmann decided on a white floor to reflect the proposed lighting?
I had to chop 4mm off the poor driver’s legs to fit him in at an acceptable height. As he is standing, I pinned him to the floor rather than rely on glue. Footless passengers await painting. Some of them will be decapitated as well! To replicate the mid 50s to early 60s, I need men with hats and ladies with hats or head-scarves so some of these heads will be swapped with Dapol figures. One issue I will probably not resolve is that more people wore glasses in that era; there were no contact lens. Andy Farquarson, Iain Rice’s co-editor at MORILL, managed to fabricate these (back in 1994) so it is possible. Will the lack of them be noticeable inside a coach’s glazing?
Attachments:
-
March 24, 2023 at 7:03 am #244209John CutlerParticipant
WARNING!
If, like me, you add seated passengers to this auto trailer, they will probably end up being too high.
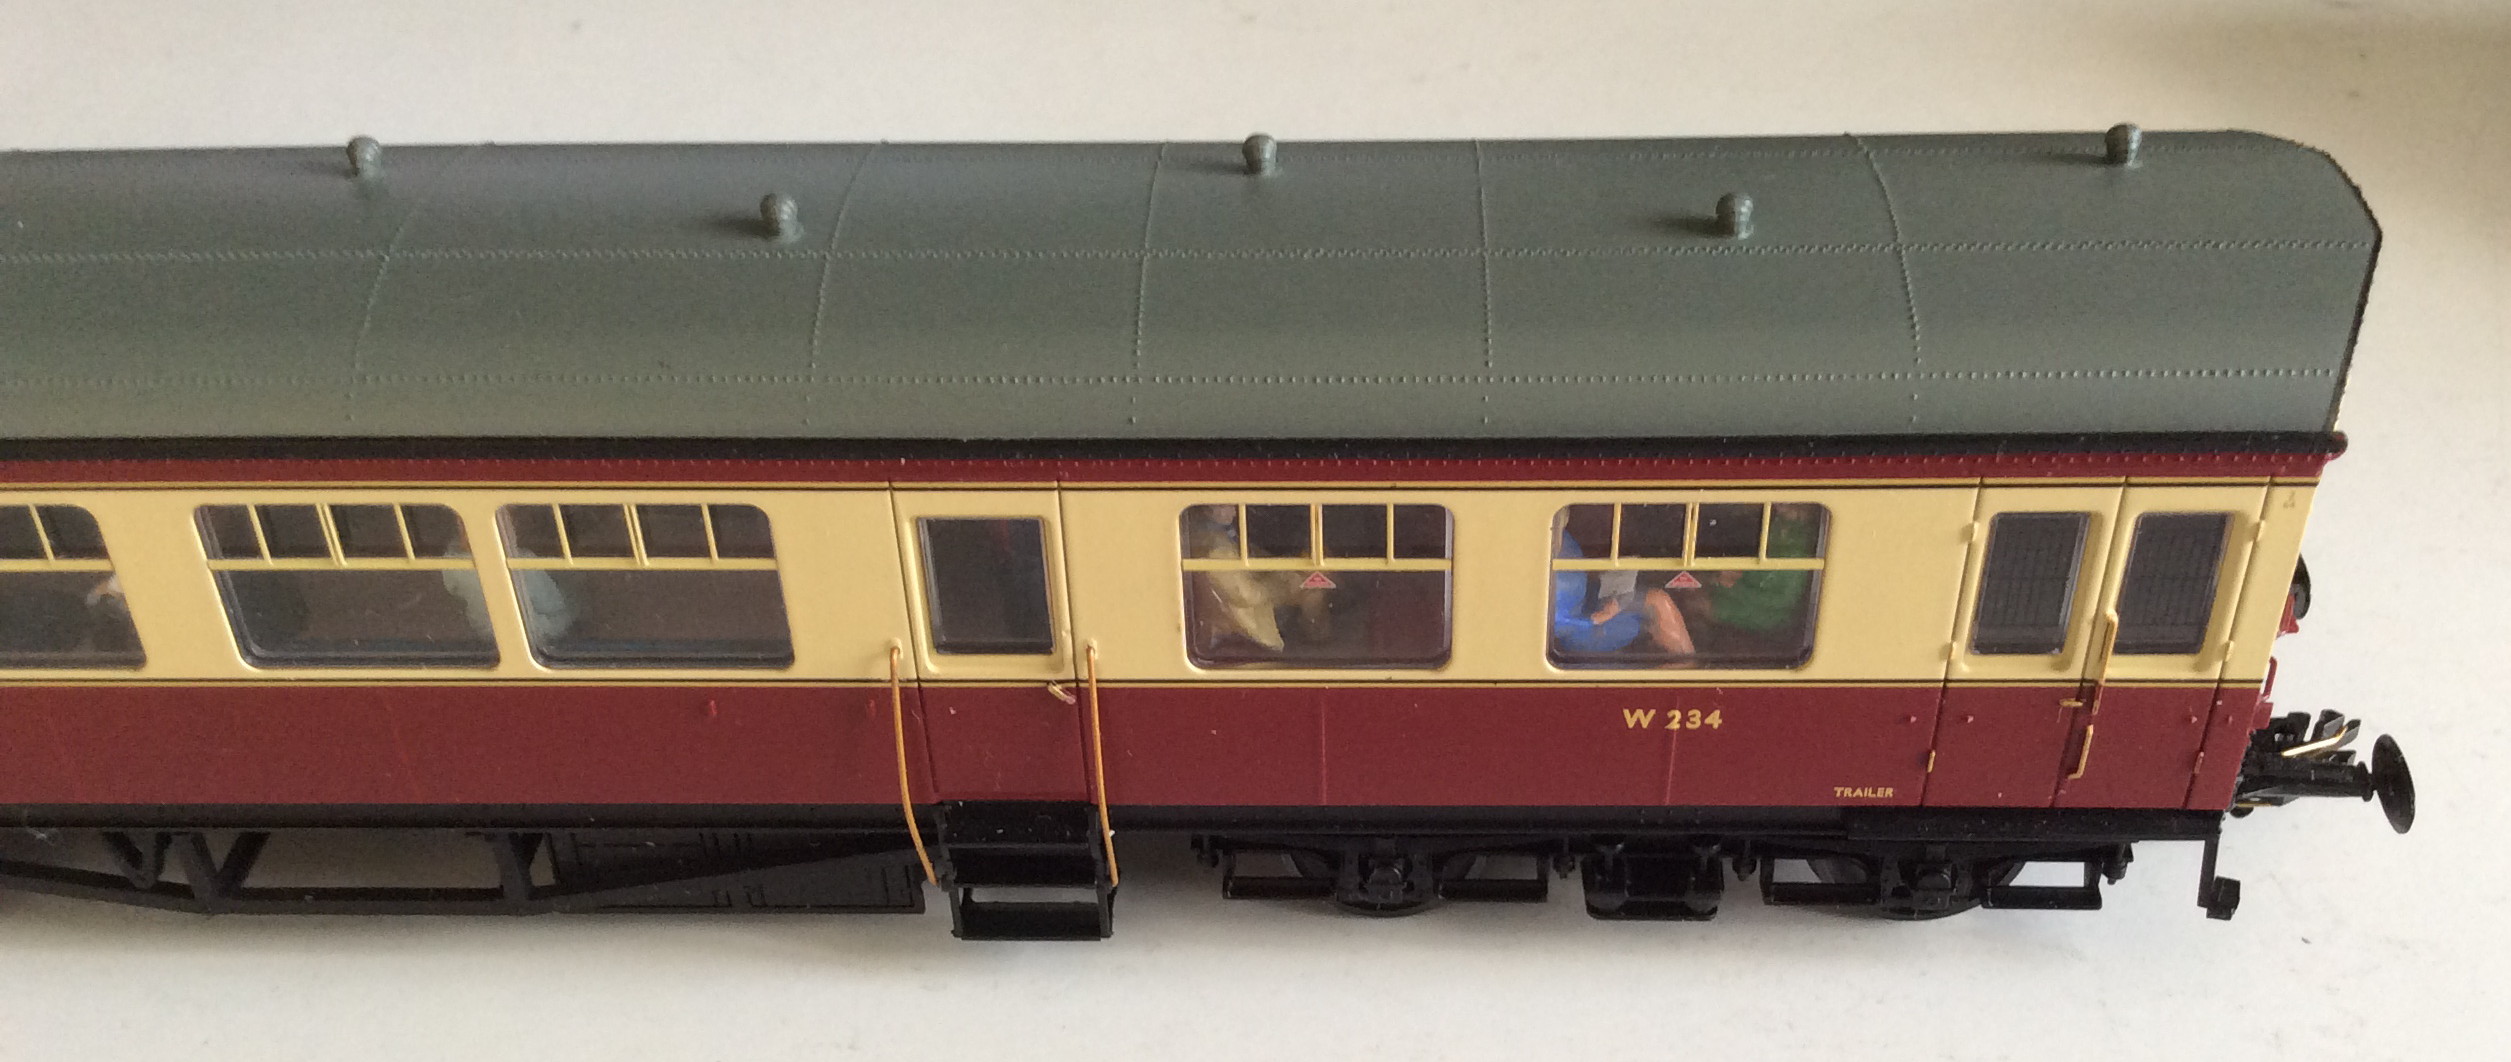
As can be seen from a previous photo, the floor is too thick and too high. This necessitates reducing the height of the unfortunate occupants by 4 or 5 mms. However, by raising the floor level, Bachmann have raised the seat levels too; I estimate by at least a scale 6” or so =2mm. This was probably done to maintain the shape of the seating visible through the windows.
This can be seen in one of the photos here. I placed a gaggle of gossiping young girls in the “No Smoking” section to hide the bogie retaining screw in the floor. From a height this looks OK but from side-on results in one young lady showing a lot of leg through the window. Paddington should expect an indignant letter from an outraged Mary Whitehouse!
The screw ‘t’other end was hidden by a cut-down collie placed over the top. It and all the seated figures are secured with Tacky Wax but the 2 standing staff are pinned to the floor.
You may decide to live with this or mutate (how?) your figures accordingly. It irritates me! I now wonder if the effort of painting and adding people, a good 2 days’ work, is worthwhile. I suppose you could try and reduce the seat heights but I am not sure this is feasible and anyway requires a lot of work, including repainting. I suggest one might as well replace the entire interior for the same effort. The next open saloon will be measured carefully for seat height before I bother to add detailed figures.
Attachments:
-
April 27, 2026 at 2:10 pm #254139
asjharris
ParticipantFor what it’s worth, I recently converted my Auto trailer, but I decided the extra pickups aren’t needed as I have a compensated 14xx. I removed the copper axle holders and using a DCC Concepts axle reamer, reamed out the bogies. I managed to make each bogie sit square, so can call this a result as I now have fitted 51L normal axle length coach wheels.
Tony
-
-
AuthorPosts
- Only logged in EMGS members can reply to this topic