› Members Forum › RTR Conversions › Rollling Stock › Carriage people costs -bankruptcy looms › Reply To: Carriage people costs -bankruptcy looms
I spent quite some time trawling the web for side views of seated people suitable for passenger silhouettes. There seem to be few such photos and even fewer representing the 50s or 60s. Forget trying to find Victorian or Edwardian photos! The Downton Abbey and Poirot websites have some useful photos and no doubt there are other similar period drama sites. These have the benefit of being in colour. There is a dearth of side views of seated ladies. Watch out for subtle copyright notices printed across the image! Many photos are in black & white so a colour converter program is useful. I managed to convert 2 photos for free on a couple of websites offering samples. A program that reduces image sizes is essential. I guess that means PhotoShop but there are others; I used the ancient and no longer available/supported PhotoStudio. This can be used for small amounts of colouring and to change background colours to make the silhouettes more visible for cutting out. It also enables the image to be flipped horizontally to allow a 2D mirror image (OK you rarely see the backs of heads!). I left the 1950s B&W photo of one elderly Devonian gent as was, apart from a couple of small colour fills; he could well be wearing a charcoal grey suit typical of the period.
Reducing the image sizes so they are approximately 1:76 is a long-winded process of trial and error. The bottom of a seated figure to the top of the head is typically 3 feet (12mm) for a 5’10” tall man. Head sizes and hats were compared for consistency but in reality there are surprising variations. Overall sizes were compared to some ModelU figures, which I trust for scale. Take care in reducing the size of photos using Word. I discovered infuriating inconsistencies and loss of definition. It is best to experiment with PhotoShop to reduce the image size and maintain the image quality. Make sure you keep copies of the original photos.
When printing, use the highest resolution you can. I found that the normal 600dpi on my printer left ink lines visible under the magnifying glass used to cut the silhouettes out. With 2400dpi printing these disappeared. I also printed 3 lots of images on the A4 paper. This allows for cutting out errors. Also, despite using good quality paper, I discovered that some images had flecks (dust or paper imperfections or printer inconsistency) so having a choice of which one to cut out is convenient.
Cutting out the silhouettes is tricky and time-consuming. I used a Slice paper-cutting tool under a magnifying glass. Lighting up the image for cutting is problematic.
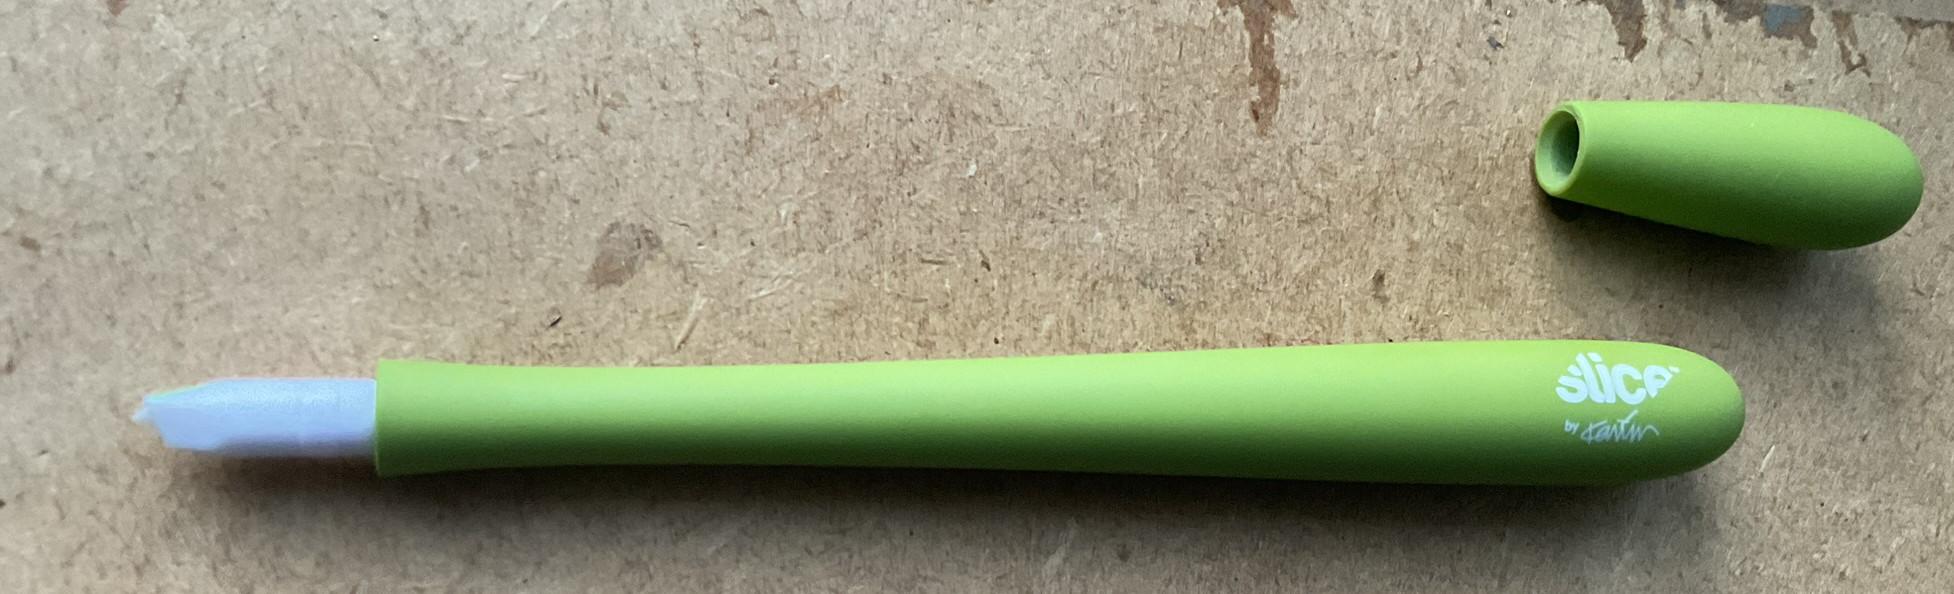
The pen-size Slice tool (cost £9 or so)
With such small scale figures, it is all too easy to slip and cut into the image. So cut out slightly over- rather than under-size, especially where shape or strength is important; e.g. prominent arms and ladies’ legs. After trimming, I found that getting a clean edge still required a lot of careful elimination of “flash” and it is too easy to over-trim. Perhaps one could use a laser cutter but that requires identifying the cutting lines as well as investment in hardware; a sledgehammer to crack a nut? If contemplating that route, for the cost involved one might as well consider a 3D printer and do the job properly.
To summarise, I found the cutting out of silhouette profiles to be too difficult (unsteady fingers!) and I was unhappy with my results.
In case anyone wants to try this out, I attach an A4 Word document with some silhouettes that will give you a head start. Note the original images are subject to copyright. The silhouettes should be safe for personal use as the images are freely available on the internet and they have been substantially altered. Please do not use them commercially or copy and/or distribute them.