› Members Forum › Kit Building › Loco Chassis › Tips for installing continuous spring beams
- This topic has 2 replies, 3 voices, and was last updated 1 year, 2 months ago by
 Jack Pedersen.
-
AuthorPosts
-
-
November 8, 2023 at 10:38 am #247124
 John CutlerParticipant
Why install csbs?
Correctly installed they ensure all wheels are on the track so electrical pick-up is reliable and traction is maximised. They give smooth running but this may not always be prototypical. Some steam locos lurched and swayed a lot.
I will confess now that I have only installed csbs in one loco, but this is what I learned:
1. For a first attempt at csbs I would recommend fitting them to a tender where you think the loco suffers from pick-up problems. Fitting is a lot easier without a gearbox in the way and the benefit with extra pickups in the tender guaranteed to pay back. It is recommended not to fit pickups on the centre axle of a 6-wheeler though; they restrict sideplay on curves. An alternative guinea pig would be the tender of a large express engine which does not ride smoothly. A sprung tender will help reduce the rough ride and might even cure it (the usual drawbar arrangement transmits tender vibration to the loco).
2. To find the fulcrum points on the loco frames for the springs you need to either employ some maths or, if you are lucky, published data for your loco. Both are available on the CLAG website:
http://www.clag.org.uk/beam-annex3.html#worked-examples
I used the Adams G6 template only to discover one of the fulcrum points clashed with the brake rod holes. I moved the fulcrum slightly, reassured by Ted Scannell of CLAG telling me not to worry overmuch (thanks Ted). Do not be put off by the precision and mathematics on the CLAG website!
3. For the fulcrum points, it is easiest to drill holes for handrail knobs. Use the overscale Markits knobs for preference. If you use the Alan Gibson ones the holes are smaller and thus trickier to thread the springs through. Put a wire through them when soldering them in place otherwise the holes will end up not being aligned.
4. To place these drilling points accurately I recommend using the High Level jig referred to on the CLAG website. See:
https://www.highlevelkits.co.uk/_files/ugd/27e471_21a407e660144392afc7cc38efbf10c2.pdf
(in the Downloads section).
This pdf’s diagrams clearly show how csbs are installed. The jig also has the advantage of facilitating the cutting out of hornblock holes when you only have circular holes in the frame for a rigid fixed-axle chassis as per the Connoisseur G6. So you can use it as a cutting guide for hornblock holes even if you are not fitting csbs. The possible down side of this approach is it tends to commit you to using High Level hornblocks but this is not an issue for me.
5. If you use a wide gearbox you need to employ thin hornblocks such as the High Level Spacesavers. I recommend these on the gearbox axle anyway so you can see the dratted suspension holes on top of the hornblocks clearly.
6. Make a keeper plate to keep the wheel set in place. This only needs to be temporary. I used a strip of brass drilled with 2 holes which went over the bolts for holding the pickup pcbs in place. Otherwise you will go nuts with the hornblocks dropping out of the chassis as you try to thread the springs through them and the fulcrum points.
7. Try to use a narrow gearbox if you can. A wide gearbox will make it trickier to see what you are doing as you try to thread the spring through the hornblock next to it. Easier said than done though if, like me, you want a high reduction gearbox like the Humpshunter for a shunting loco like the Adams G6.
8. The perceived wisdom seems to advise fixing stopblocks to the frames to prevent the csbs falling out after installation. My simpler solution is to make the csb longer than required and put a right-angle bend in one end allowing 4 or 5 mms to stick out. Now drill a hole as small as possible (but larger than the spring diameter) towards one end of the frame and in line with the fulcrum points. With the csb in place, push the short stub of the spring through this hole. Shove a tiny bit of Blutak in the hole from the inside of the frame to hold it in place. Now cut off the excess of csb to length. A bit should protrude from the outside frame but will be unnoticeable.
9. Beware of fouling the csbs. It took me ages to find out why my G6 persisted in appearing ready for lunar take-off! I thought this was down to my incompetence with incorrect spring threading or poor weight distribution or both. The culprits were eventually discovered to be over-thick pickup wires pushed out of position when the chassis was joined to the body. This was when I discovered that faffing about with weights did not make as much difference as I was led to believe. Ugh! I did originally try a split chassis but gave this up because the only high reduction gearbox available is too wide; Paul Willis gives a possible solution to that in an earlier thread on this forum (but too late for me!); see “gearboxes for split axles” under RTR Conversions (I should have posted that in Kit Conversions -sorry!). I am not sure Paul’s approach will work with a 2-stage reduction gearbox like the Humpshunter.
10. Do not worry overmuch about getting weight equally and precisely distributed in the loco. As long as it is roughly equal it will not make much difference in my (limited) experience.
11. Having said this, I would strongly recommend against employing csbs in 4-4-0s or 0-4-4Ts unless you have a lot of csb experience. These wheelsets have given me a lot of anguish in the (distant) past. If I was going for csbs in these I would still try to compensate the drivers. However, I intend to try this out with the Rhymney Models chassis for the Johnson 1P 0-4-4T (for all you Highbridge aficionados, the beautiful body is available as a spare direct from Bachmann for £50:
https://bachmann-spares.co.uk/category/2-branchline-steam-parts/mr-1532-johnson-1p
). This is designed for csbs but I guess weight distribution will be critical for this locomotive. This is in the Round Tuit file so do not expect any outcome on this to be posted for a while!
Yes, csbs do work! For me eventually. But threading the springs through repeatedly trying to sort out problems tired my eyes out! If you follow the advice above you will hopefully avoid most issues.
If anyone sees Ted Scannell, ask him how his ancient G6 chassis upgrade is progressing!
Attachments:
-
November 15, 2023 at 11:37 pm #247204
Paul Willis
ParticipantOn John Cutler saidWhy install csbs?
6. Make a keeper plate to keep the wheel set in place. This only needs to be temporary. I used a strip of brass drilled with 2 holes which went over the bolts for holding the pickup pcbs in place. Otherwise you will go nuts with the hornblocks dropping out of the chassis as you try to thread the springs through them and the fulcrum points.
7. Try to use a narrow gearbox if you can. A wide gearbox will make it trickier to see what you are doing as you try to thread the spring through the hornblock next to it. Easier said than done though if, like me, you want a high reduction gearbox like the Humpshunter for a shunting loco like the Adams G6.
8. The perceived wisdom seems to advise fixing stopblocks to the frames to prevent the csbs falling out after installation. My simpler solution is to make the csb longer than required and put a right-angle bend in one end allowing 4 or 5 mms to stick out. Now drill a hole as small as possible (but larger than the spring diameter) towards one end of the frame and in line with the fulcrum points. With the csb in place, push the short stub of the spring through this hole. Shove a tiny bit of Blutak in the hole from the inside of the frame to hold it in place. Now cut off the excess of csb to length. A bit should protrude from the outside frame but will be unnoticeable.
Hi John,
Thank you for writing such an excellent summary of some of the points about CSBs. It’s good to see positive comments about the benefits they give. Other than where a kit is specifically designed to be compensated and includes the relevant beams etc, I always will build CSB now.
A couple of comments on what you have written, which may help others.
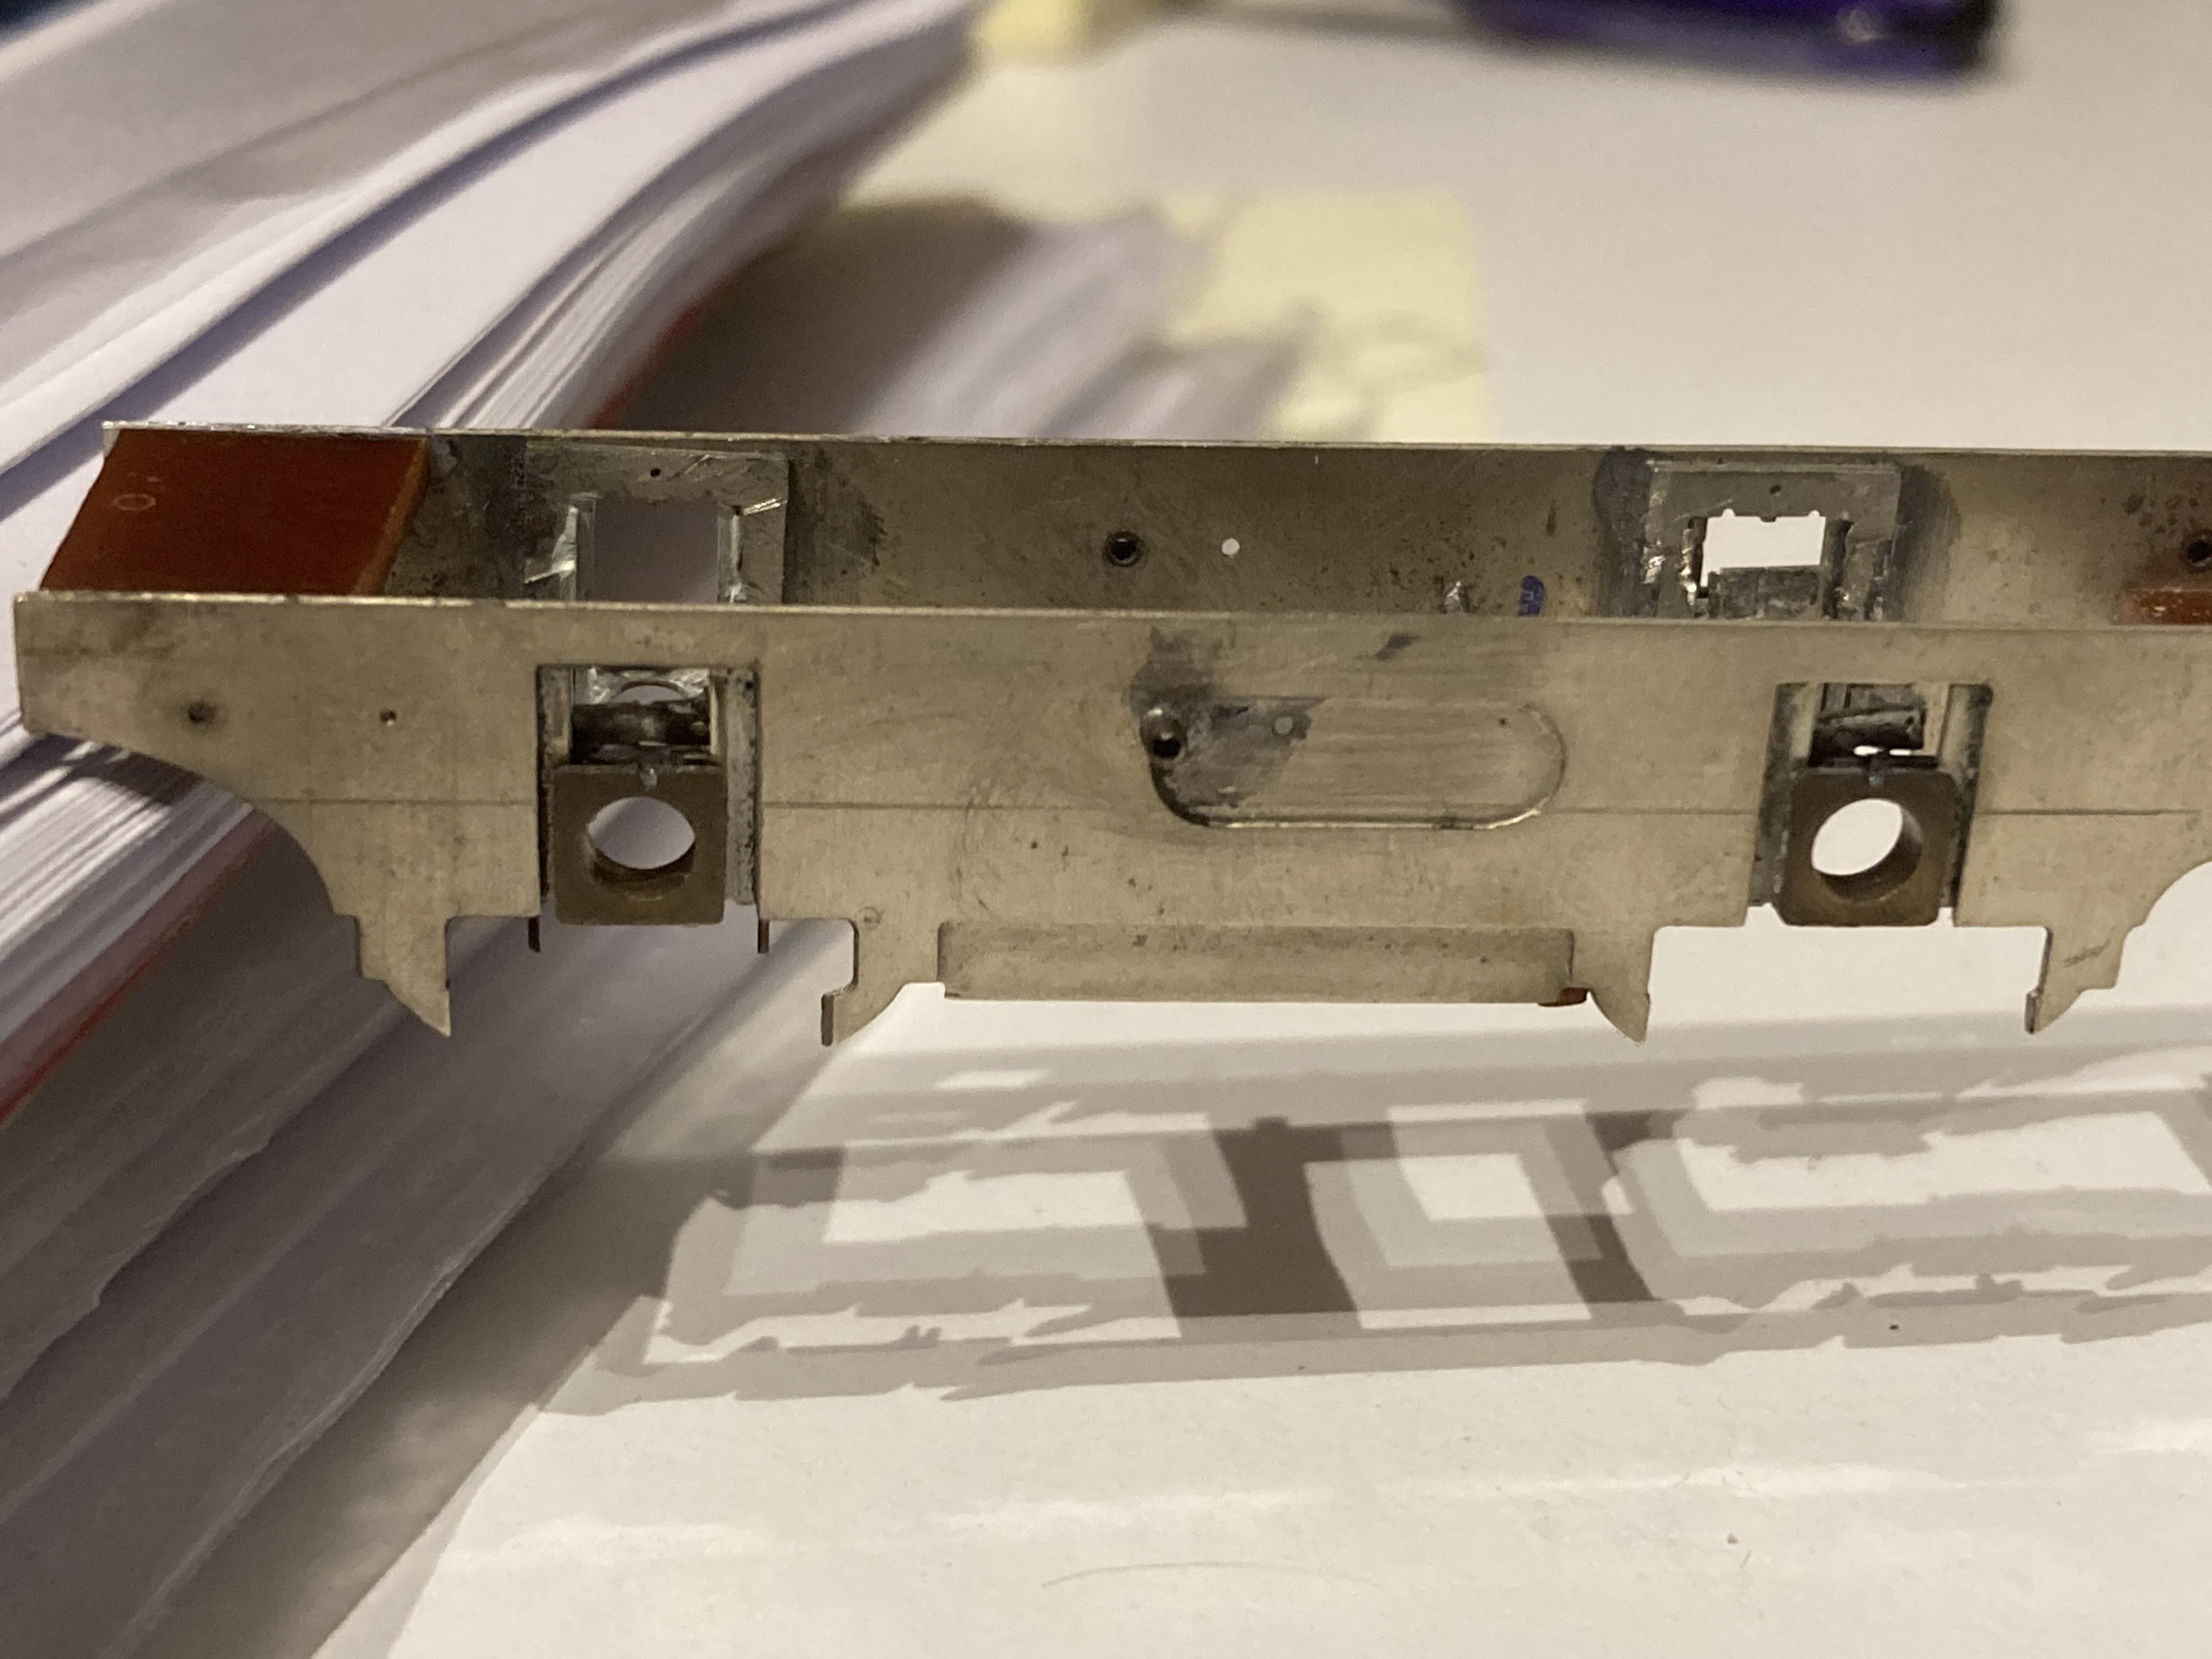
#6 – If you are using High Level hornblocks, which I infer that you are, you don’t need a keeper plate. You just use the two tiny “ears” at the bottom of the horn cheeks to thread a piece of wire through. If you _do_ need to remove the hornblocks at any point, you just snip it through and drop them. This is how they are on a GER 2-4-0 chassis:

#7 – whilst a slimliner is the gearbox of choice, I wouldn’t see any problem with using a multistage gearbox as long as it all fits when you narrow it. Chris’s “+” range of gearboxes with the rotating final stage give a further range of possibilities as well. If all else fails, cut it down the middle and narrow it!
#8 – I have never heard of the use of “stopblocks” to prevent the wires falling out. Equally, the approach that you use with blutack and extra holes seems over-engineered. I just make my wires about 4-5mm overlength at each end, and bend the last bit at a right angle. This is within the frames, and it doesn’t show in any way. As long as the wire is still free to move within the pivot points (handrail knobs) then you should have no problems.
Thanks again for the notes, and I hope that you have dispelled a little bit of reluctance. We may well see some better running locomotives on track soon.
Best,
Paul
-
May 2, 2025 at 2:52 am #251520
 Jack PedersenParticipant
Great post John.
CSB’s are definitely a step up in ease of use and maintenance. Admittedly they are more involved to set up than other springing methods, but the end result is usually very free running and easy to build.
Will L on the Scalefour forum posted a fantastic blow by blow account of some of the things worth considering when building a sprung chassis. It covers off a fair few examples and is quite intensive, but makes for good reading and certainly helped me understand the theory a bit more. The high level Jig is invaluable for anyone considering CSB.
https://www.scalefour.org/forum/viewtopic.php?f=19&t=947
I’ve not bothered with the keeper plate, but it’s a good idea – possibly a little over engineered. But if it works for you then fantastic. I usually use some sacrificial wire, the type you find in kits of old, coiled up, turned down at the ends to retain it. Then when the spring wire is put in place, I snip them free.
-
-
AuthorPosts
- Only logged in EMGS members can reply to this topic