› Members Forum › RTR Conversions › Locos › gearboxes for split axles
- This topic has 4 replies, 3 voices, and was last updated 2 years, 8 months ago by
Paul Willis.
-
AuthorPosts
-
-
February 10, 2021 at 8:42 pm #240740
 John CutlerParticipant
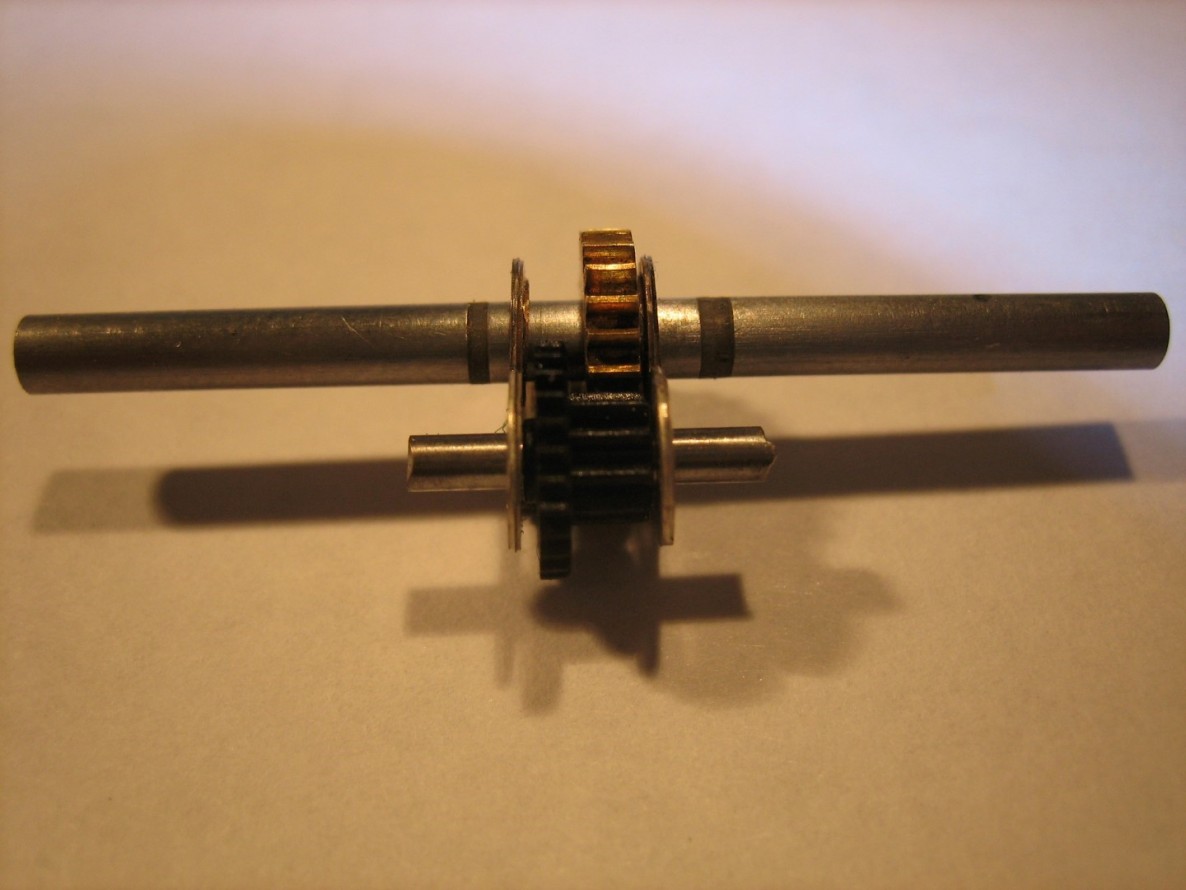
Paul Willis kindly supplied these photos to show how a High Level gearbox can be cut and shut to fit within the confines of a split axle.
It looks simple but I would like to know a bit more please.
The big question is how do you ensure this assembly ends up being square?
Secondly do you use washers to ensure clearances on the intermediate axle?It is annoying that the higher ratio HL gearboxes (e.g. the Humpshunter) are the widest.
(Incidentally the High Level web site does not show their gearbox widths but the EMGS manual show them on page 2.7.0.(6)).


-
This topic was modified 2 years, 7 months ago by
 John Cutler. Reason: original photos lost!
-
This topic was modified 2 years, 7 months ago by John Cutler. Reason: original photos lost!
Attachments:
-
This topic was modified 2 years, 7 months ago by
-
February 14, 2021 at 9:55 am #241109
Paul Willis
ParticipantSorry John.
I just wrote a very long reply, explaining the process, and the EMGS Forum crashed when I attempted to upload the photos. It’s just not very good software, and the size restriction on images is ridiculous.
I’ll have a look if I wrote about it at the time on the Scalefour Forum, and post a link from there.
Cheers
Paul -
February 14, 2021 at 10:34 am #241110Participant
@Paul Willis said:
Sorry John.I just wrote a very long reply, explaining the process, and the EMGS Forum crashed when I attempted to upload the photos. It’s just not very good software, and the size restriction on images is ridiculous.
I’ll have a look if I wrote about it at the time on the Scalefour Forum, and post a link from there.
Cheers
PaulHi John,
Have a read here. There is a longer narrative, and more pictures to show how it is done. Copy/paste the URL below.
https://www.scalefour.org/forum/viewtopic.php?f=90&t=6821&p=75179&hilit=gearbox#p75179
Cheers
Paul -
August 18, 2023 at 3:13 pm #245840
Geoff Stenner
ParticipantI have used these gearboxes on split axles. Sometimes it is a question of getting the split in the right place, but another option is to turn, or get turned for you a tufnol axle bearing to replace one of those in brass. The whole assembly remains live to one side of the frames, but will not bridge to the other if care is taken with further insulation inside the loco body.
Geoff Stenner
-
August 18, 2023 at 7:55 pm #245843ParticipantOn Geoff Stenner said
I have used these gearboxes on split axles. Sometimes it is a question of getting the split in the right place, but another option is to turn, or get turned for you a tufnol axle bearing to replace one of those in brass. The whole assembly remains live to one side of the frames, but will not bridge to the other if care is taken with further insulation inside the loco body.
Which is a good point to illustrate exactly this…
Building split-chassis frames, I’m acutely aware of the risks of shorts. To do this, I take two steps once the body is finished, bar the final details. I line the underneath of the running plate and any other areas that could possibly touch either side of the split chassis frames, spacers, etc.
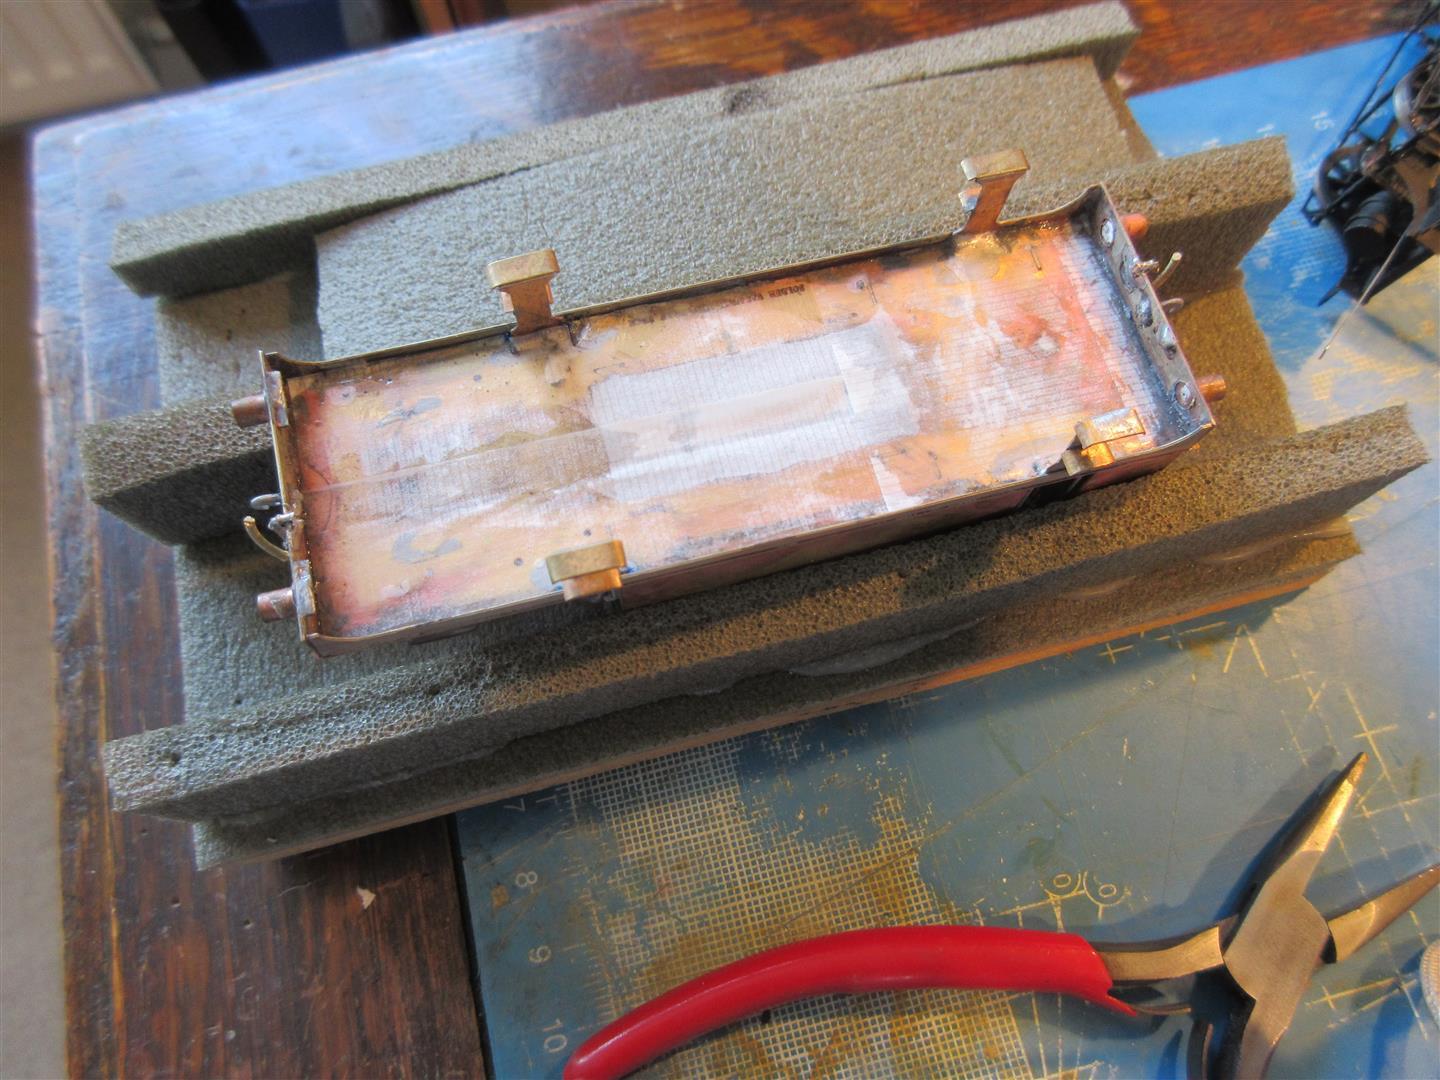
Because I build fully sprung chassis – Continuous Springy Beams, to be precise – I also line the sides of the gearbox. This is in case any slight vertical, cant or lateral movement brings it into contact with something that it shouldn’t:
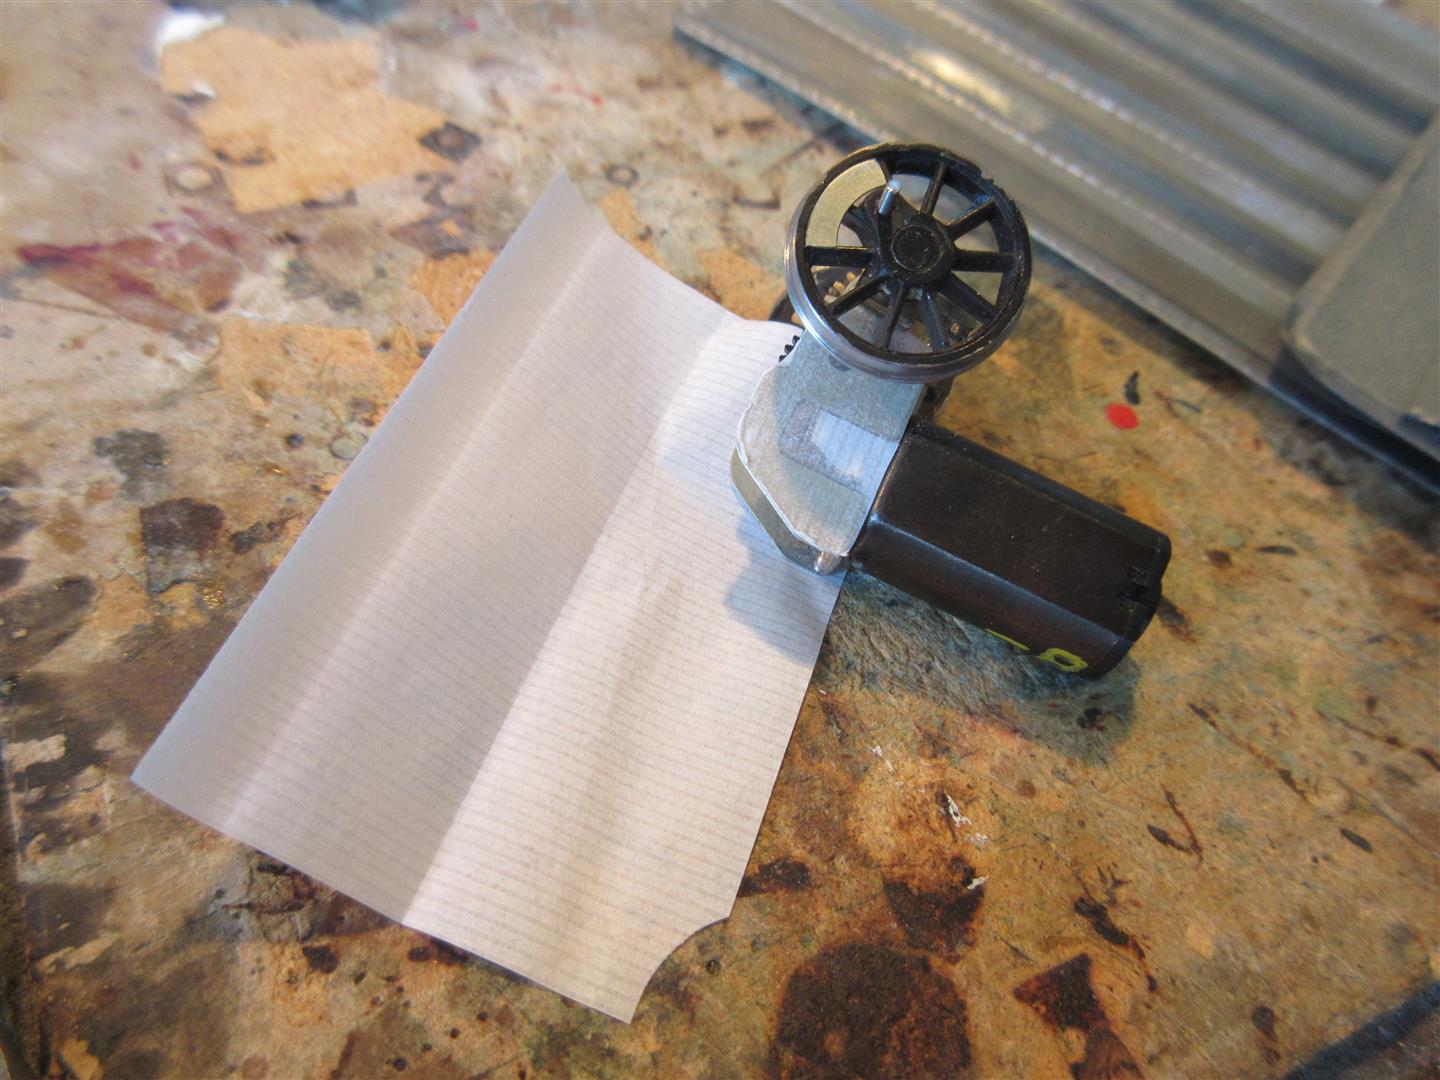
In both photos, the insulating material is cigarette papers – I use green Rizla, bought from the newsagent every so often. I get through quite a of them for a non-smoker, as they are useful for temporary washers, and the like.
I fix these using a very runny Zap superglue, so that it soaks through the paper, and it can adhere as closely as possible to the underlying surface. And of course it takes paint very well, should that be needed.
The total thickness of the paper+glue is the smallest fraction of a millimetre, so there is no risk of your buffers suddenly ending up a scale three inches too high. In the pictures, the papers have yet to be trimmed back. With the glue thoroughly dry, it can be easily trimmed with a sharp scalpel, like five thou plasticard, but much, much thinner.
I hope that this inspires people to give split-chassis a try. It’s really not difficult, if I can manage it very successfully.
Best,
Paul
Attachments:
-
-
AuthorPosts


- Only logged in EMGS members can reply to this topic