› Members Forum › Kit Building › Loco Chassis › Alan Gibson pickups › Reply To: Alan Gibson pickups
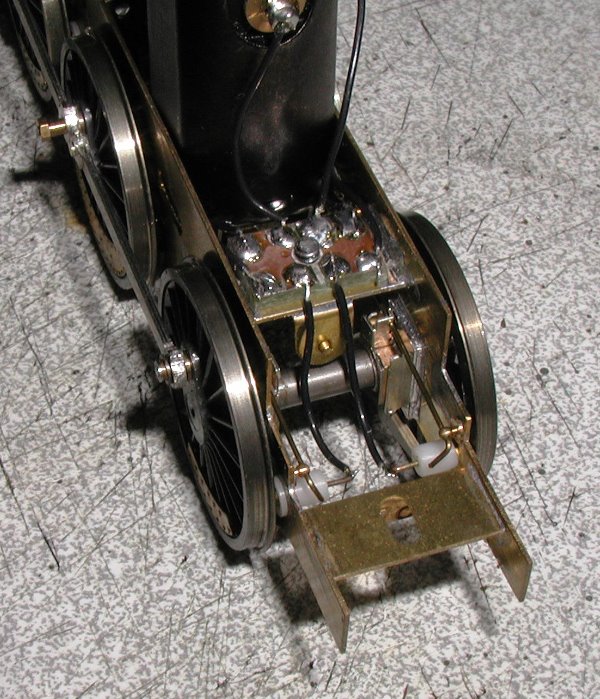
Hi Richard, First I drill the chassis, obviously, then try in the plastic bush and size up the length of very fine wire needed to reach the bit of copperclad used for all the connections then remove the bush and try in the plunger, clean out the bore if necessary with a 1.5mm drill and the small hole with a 0.6mm drill, if all okay I use a black ‘Sharpie’ marker pen to colour the bush. If there is limited clearance behind the wheel flange I reduce the length of the head of the plunger to suit (by as much as 1mm in some cases). Assemble the plunger with the spring and insert into the bush pushing it in flush and grip the tail next to the bush with fine pointy pliers and bend the end of the tail to about 45′ with the fingernail. I use some locking tweezers to hold the plunger tail next to the bush and tin the end of the tail, the tweezers act as a heat sink so the bush should be okay. Solder on the precut wires and insert the plunger into the chassis frames preferably after painting the frames then wire up to the copperclad and wire the motor to the copperclad. If the plunger is pushed out of line by the wire put a twist in the wire with the tweezers till the plunger moves freely. A spot of cyano on a cocktail stick is used the finally secure the plunger .
Bob’s yer auntie.
Picture also shows:- CSB suspension, Highlevel hornblocks and bracket for torque reaction arm from Highlevel gearbox.
-
This reply was modified 9 months, 2 weeks ago by
 David Franks.