› Members Forum › RTR Conversions › Locos › Quartering RTR wheels › Reply To: Quartering RTR wheels
Quartering Again
Having chosen to go down the route of using the Bill Bedford jig for quartering RTR wheels, I have discovered there are shortcomings:
1. All the wheels on a loco must be quartered using the Bedford jig. You cannot mix and match i.e. set one wheelset with the jig then use a GW press or eyeball to quarter the others. The jig does not set at precisely 90 degrees but will set all wheelsets consistently at the same angle.
2. The jig cannot work if there are bearings and spacing washers narrowly confined between a wheel and a final gear; the jig cannot support the axle at one end. This is the case with many RTR locos with offset final gear drives such as the Hornby Adams Radial.
I ended up resorting to using the eyeball method for the Adams Radial. It is impossible to use the GW wheel-press because the front driver crankpins are too long at 5mm (8mm gross). This loco is tricky to quarter for the human eye, even with a mirror, because the wheel has the crank at Pin Between spoke and there are 18 spokes. Too many of them and none at the desirable quarter points to give the eye an easy task when looking through the wheels.
A requirement for successful quartering is to ensure the axles are to the correct length beforehand. Measure the depth of the wheel (x2) and the required Back-to-Back to obtain this. Allow for any boss on the back of the wheel. Alan Gibson now require customers to cut/file their axles to length. If you do not do this, you will discover your GW wheel-press gives horrible results, and closure of the wheels in a vice fails. I use a mini-drill (with cutting attachments) or cheap diamond-coated files to reduce the axle lengths. Remember to lightly chamfer the ends of the axles afterwards so they will ease into the wheel holes and not cut into the plastic. I think AG chamfer them, so I only file back one end of an axle.
I have discovered a simple and fairly reliable eyeball solution using old tech! You need two pieces of Sellotape cut wider than the wheel diameter.
Fix one wheel on the axle permanently using a vice, taking care it is at 90 degrees. Add any gears, bearings and spacing washers.
With the crank at top dead centre, place the top of a piece of Sellotape horizontally across the full diameter of that wheel, so it crosses the centre of the axle, and stick it down. Turn this wheel with attached tape clockwise so it is at roughly 90 degrees vertically.
The next wheel should be added so that it has stiction i.e. be capable of being turned but not so loose it will fall off the axle; I reckon the axle needs to be about a quarter or a third of the way in.
Now add Sellotape to it. Turn this wheel so the crank is at top dead centre whilst keeping the opposite wheel with its tape in the vertical position. The Sellotape should indicate when both pieces are at 90 degrees. You can always use a protractor or engineer’s square to check. I find a mirror helpful, if only to check that the opposite tape has not moved out of position.
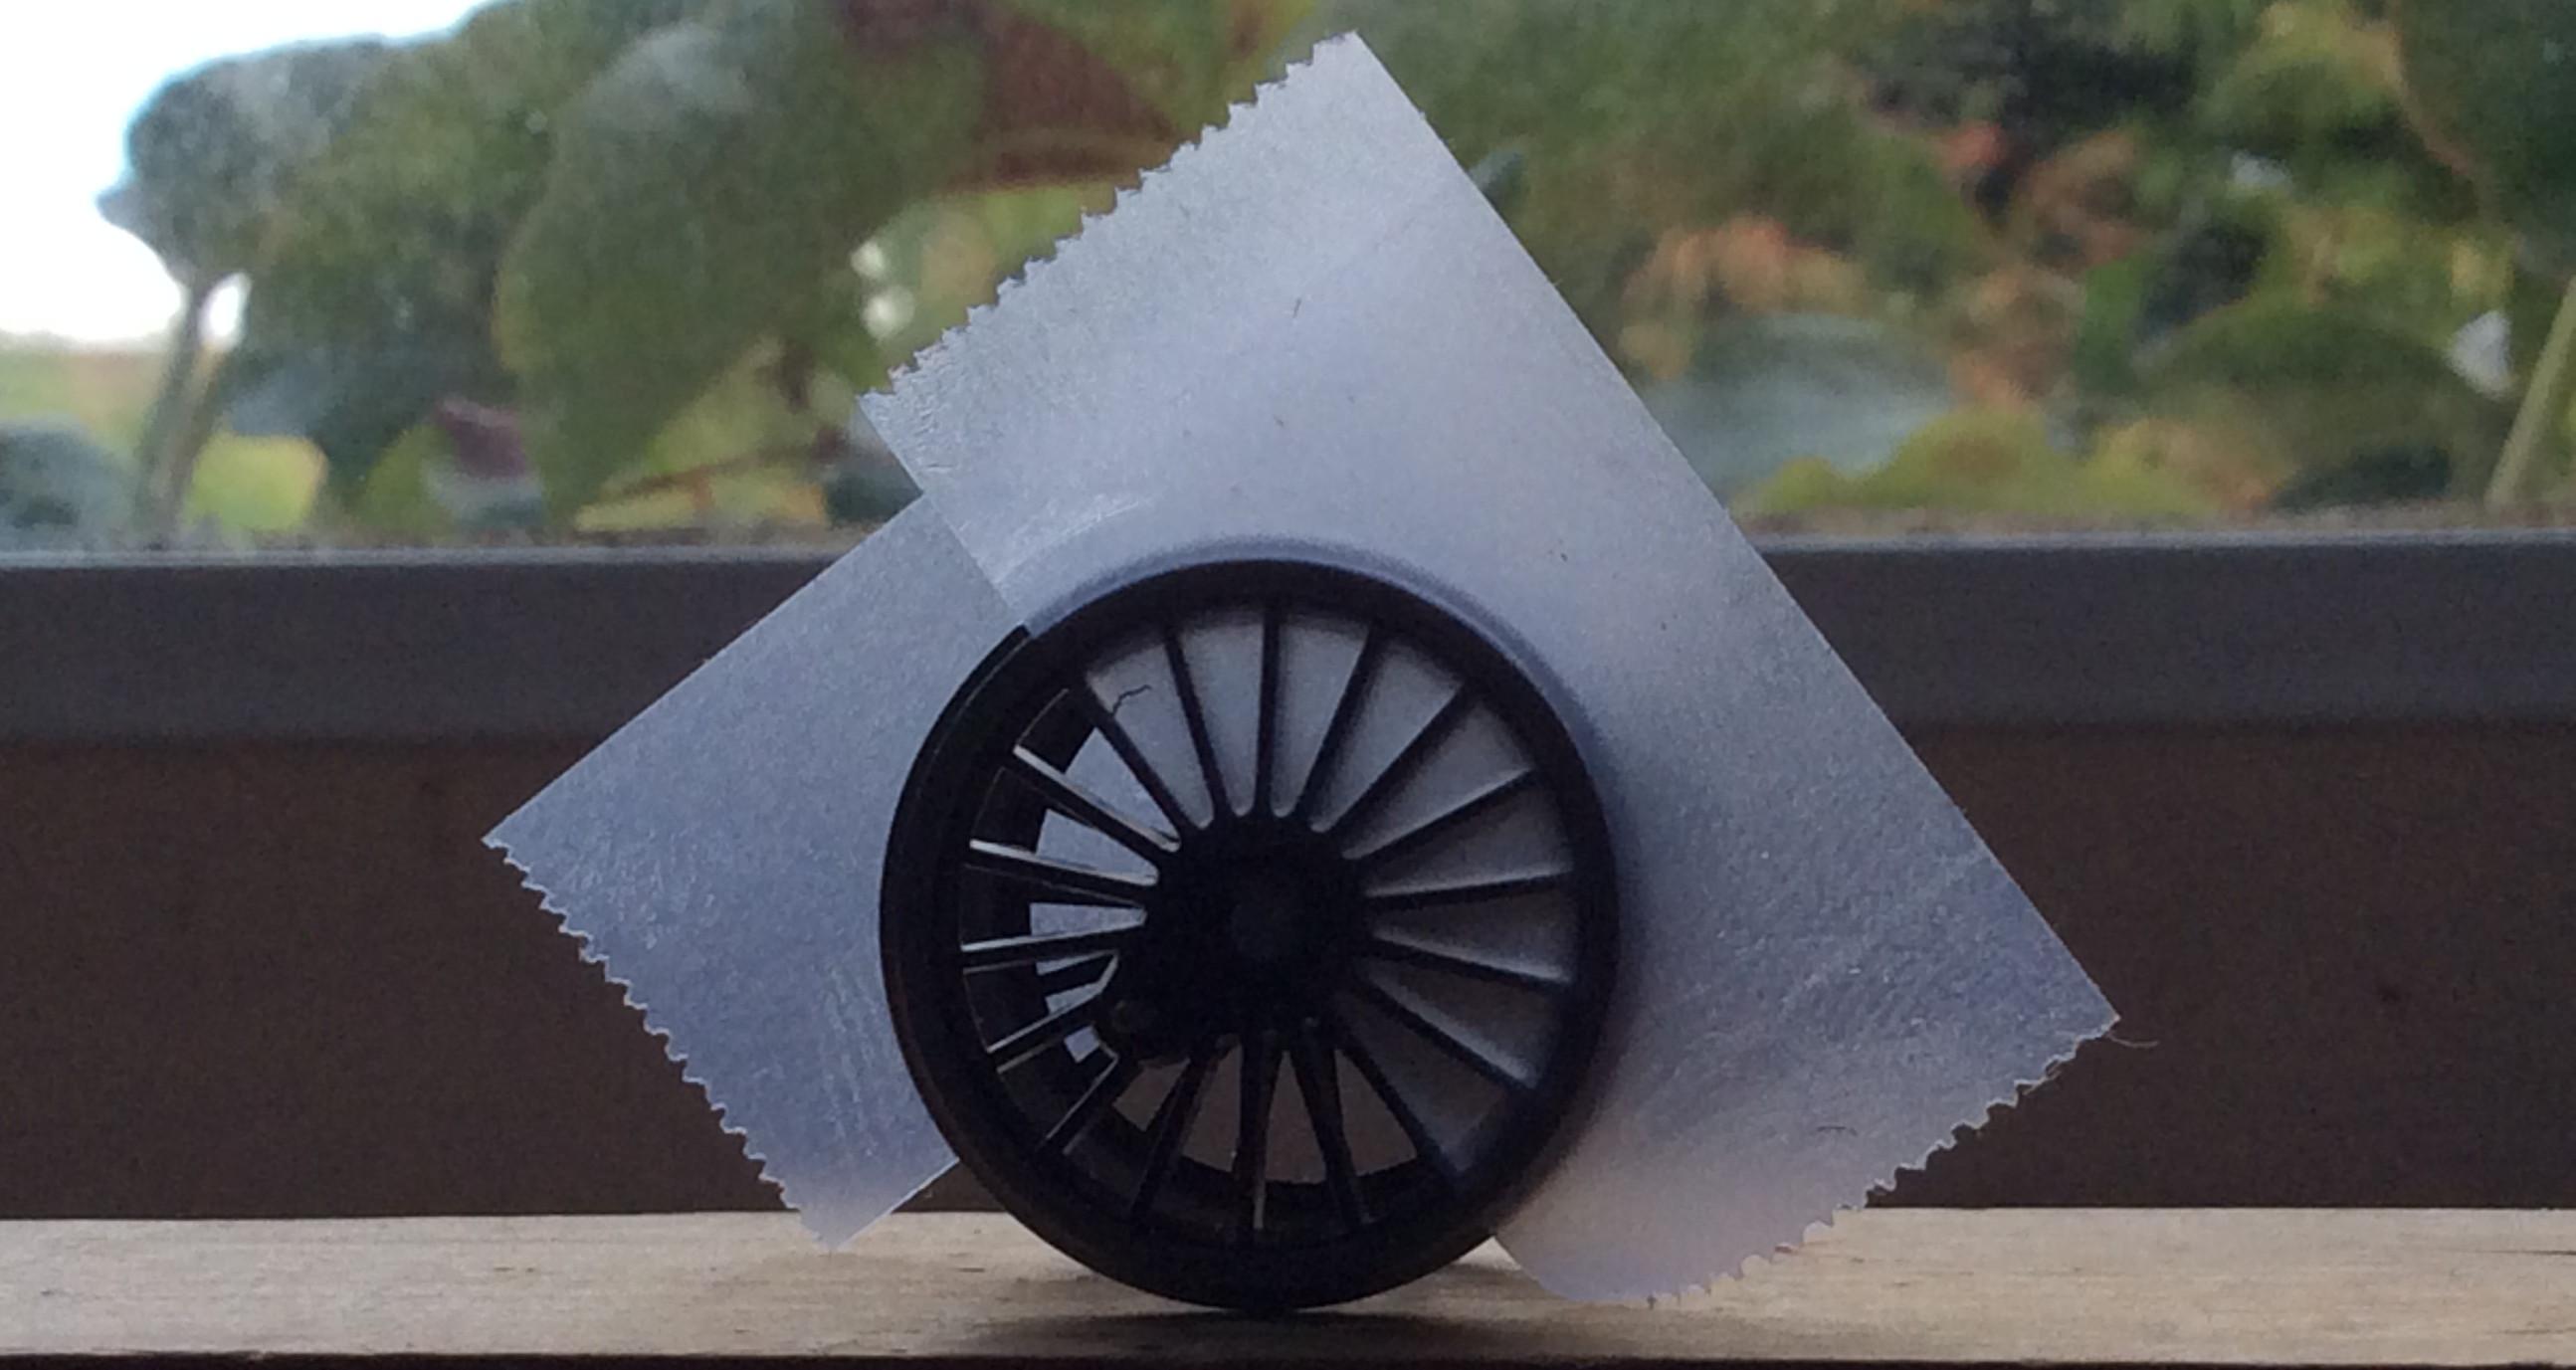
The spokes can still be seen through the Sellotape.
Once you are happy with the quartering, press the wheels together slightly to lock them and then in a small vice with a Back-to-Back gauge between them.
An alternative is to use Post-It Notes instead of Sellotape. These should be cut out of the sticky parts of the Notes to form two rectangles quite a bit wider than the wheel diameters. I recommend cutting these so the long sides are parallel; it is surprising how the eye/brain can be deceived if they are not. These give a more vivid indication of the quartering angle but are more likely to drop off or move position on the wheel; I prefer Sellotape.

It is just coincidence that the Post-It Notes are supporting the wheel like this.
This method can also be used for those 3-cylinder locos where the cranks are not quartered but at 60 (?) degrees. It is also useful for older chassis where the wheels have to be quartered in situ i.e. the wheelsets do not drop in and there is no keeper plate.
I might retire both the GW wheel-press and the Bill Bedford jig!